Thursday, February 28, 2013

Time to Plant the Tomatoes! I Love Starting Seeds.


There may be snow on the ground, but there are tomato seeds growing on my greenhouse sunporch! In my particular zone of the USA, mid to late February is the perfect time to start the tomato seeds. You want nice, healthy starts by the time May 3rd gets here, so that they can go right into the garden! I listed some of the seeds I've started on the back of this envelope. I thought this would be fun to trim out and make a page of it in my art journal. I can draw flowers all around it!
Seed packets from the store

I don't know why, but last year I had ordered some fairly expensive Burpee seeds, and they didn't do well at all. In fact, it was the 20-cent to one-dollar seed packets I picked up at the store that did the best of all. So, this year, that's what I'm going with. I've spent less than five bucks, and already have enough for my kitchen garden.

I like my kitchen garden to have a lot of diversity--vegetables and herbs mixed together, cutting flowers, and marigolds in every corner to guard them all. Marigolds have natural antioxidants and can actually protect against some diseases.

Tomatoes and leeks take the longest to grow--so I've started several pots. It's good to cover them and keep them warm and moist until they sprout up, and then after that they need sunshine. Sometime in April when I have healthy starts, I will take them all outside during the day to begin hardening them off before they go live in the garden. My goodness, it's like having children!
I can't wait to put those radish seeds straight into the garden in March! The lettuces too.
I am starting some basil seeds right in this egg carton. I can close the lid to keep them warm until they sprout up!

Basil seeds are tiny and they don't mind being in a small container. I've got 18 started here. In May, I'll put the starts in the garden around their companion tomato plants, and then all summer long I'll keep throwing more basil seeds in the garden so that I constantly have a supply of fresh young basils for my pesto, pasta and salads. Can you tell I love basil just a little?

I use all kinds of ways to label everything--clothespins, Popsicle sticks, and old plant markers. This is a tray of big boy hybrid tomato seeds--so I just clipped one clothespin to it. These pots are big enough so that I don't have to transplant the seedlings when they get bigger.
The top shelf of my potting bench--although I do the dirty work here, I keep it very fun and festive too.
I have used everything you can imagine for pots to start my seedlings. Some years I do buy those nice seed-starting trays, but this year I am using what I have on hand and improvising too--there is no need to spend a bundle when you are starting seeds. Use pudding or yogurt cups washed out with a hole punched in the bottom for drainage, half-pint milk cartons (like we did in grade school) and recycle those plastic pots you buy starts in--it all works great, and is worth the trouble to grow food not lawns!


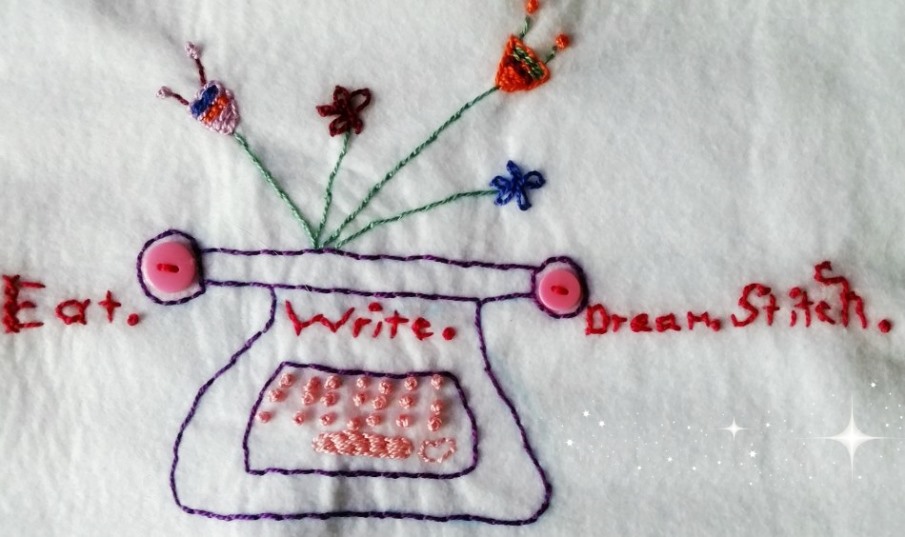
Eat, Write, Dream, and Stitch in the sun.


Wednesday, February 27, 2013

WOYWW 195--Warm and Cozy at My Worktable

A pic of me in makeup and costume for King & I.
Ice...snow...rain...sleet...snizzle (a combo of drizzle and snow)--we have had it all in the Ozarks since last week. So my worktable has been a busy, happy place. I found my little seed-stitch knitting project, a UFO (unfinsihed object).  Art journal, open--I love to use snippets from the inside of those official envelopes. And even though it's a mess, it's cleaner than usual because I'm using one of those fun fabric trays to organize my bits and bobs. Now...I don't normally say "bits and bobs" but I've seen so many other WOYWWers say that phrase, I love it!

Anyhoo....

Visit all the lovelies across the globe who share their workdesks right here at What's-On-Your-Workdesk-Wednesday. Mrs. Dunnit has been kind enough to keep this fun blog party going for years!

My bits and bobs like this tray!
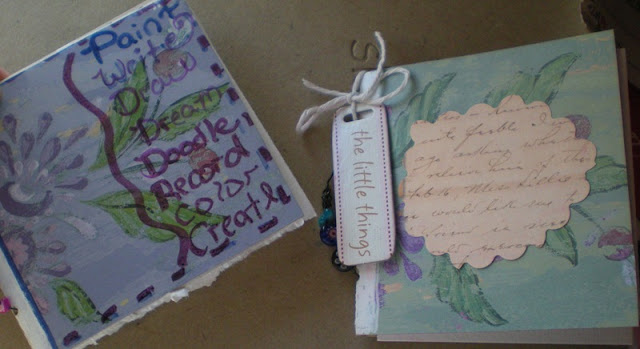
 I still have remnants on my desk of working on these cute little watercolor pocket journals, upcycled from tissue boxes! I posted a blog about that yesterday--so fun.
And one more thing--I have to say my most favorite little thing lately is my datestamp! Too funny...but it has some little phrases to choose from, and I stamp the date into my art journal and write a little diddy about my day. Love it! Now I'm off to visit my crafty buddies, and hopefully some newbies, and peek in on your projects!
My favorite date stamp!


Eat, Write, Dream, and Stitch in your happy place.

Tuesday, February 26, 2013

Make a Tissue Box Pocket Journal - Paint on the Go


One minute you're dabbing away the tears from the season finale of Downton Abbey--and the next minute you're onto an adventure with your lovely pocket journal tucked in your bag--all made from the same tissue box that tended to your tears!!

Okay, that was dramatic, but seriously, who doesn't want to upcycle a tissue box into something so fantastic? I started buying Hyvee brand tissues (my grocery store), mainly because I liked the design of their nice, fat and tall tissue boxes. I mean, someone went to a lot of trouble to make them pretty enough to sit on our vanities!
When all the tissues are gone, I snip up the pretty cardboard and make these fun little watercolor journals, ready to tuck in your bag, and paint your thoughts! Here's how it goes.

STEP 1: Cut your cardboard to a nice vertical size. It will be folded in half.
STEP 2: Use a paint pen to create the spine in the center, and let dry.

STEP 3: Score down the center and make a nice, clean fold.
STEP 4: Use markers, scrapbook paper, and even tags and stickers to decorate the outside and inside of the cover.
STEP 5: Prepare some craft wire and beads for the handle.
  STEP 6: Cut a strip of watercolor paper and measure it to fit inside your cover, scoring and folding for an accordian fold-out. Or, you can fold in half and place inside. You can fit in anywhere from 4 to 10 little pages. You can cut it to size, or use a ruler and tear it for a fun rough edge.
   STEP 7: Use a heavy duty hole punch and punch two small holes in the spine, going through the watercolor paper and the cover. Poke the craft wire through the holes, add beads, and twist and trim it closed.
Each little pocket journal can be decorated differently--then it's time to paint your first page!
This will fit into any bag.


Eat, Write, Dream, and Stitch Happy.


Monday, February 25, 2013

Heart-a-Day 2013 Week 8 - More Text on Textile

This on-going, possibly-year-long project just gets more fun all the time. It's one thing when you sit down and write things in your art journal, for example. But it's another when you think of things to write with embroidery floss--it just seems a little more permanent. I'm having fun, though, making up this text for my textile!


Project Summary
Project Name: A Heart a Day 2013
Start Day: January 1, 2013
Materials: White Platinum 14-count Aida Cloth (a beautiful, high-quality, 
crisp white) DMC's Anniversary Embroidery Floss Pack - 36 gorgeous colors 
 celebrating DMC's 100th anniversary, beginning with DMC 3831 and going in order through 3866
Technique: Cross-stitch
 Colors used in order in Row 1: 3831/3833; 3833; 3831/3837; 3837; 3838/3836; 3838; 3842/3841; 3836; 3853/3837; 3854; 3854/3847; 3847
Row 2: 3834, 3834/3865, 3850, 3850/32, 3861, 3831/61, 3864, 3843/64, 3846, 3839/56, 3854/47, 3847, 3834
Row 3: 3848/66, 3842, 3854/42, 3853, 3857/63, 3835
Goal: Fill the 18X20 inch aida tapestry with hearts and text


x
x
x
x
x
x
x
x
x
x
x
x
x
x
x
x
x
x
x
x
x
x
x
x
x
x
x
x
x
x
x
x
x
x
x
x
x
x
x
x
x
x
x
x
x
x
x
x
x
x
x
x
x
x
x
x
x
x
x
x
x
x
x
x
x
x
x
x
x
x
x
x
x
x
x
x
x
x
x
x
x
x
x
x
x
x
x
x
x
x
x
x
x
x
x
x
x
x
x
x
x
x
x
Enjoy!
x
Cross-stitched Heart