Wednesday, December 29, 2010

Holiday WOYWW


It's the Last What's-On-Your-Workdesk-Wednesday of 2010!   
We are in-between Christmas and New Years, and I definitely have some projects on my craft desk that I'm hoping to finish. This is a very old picture of my great Aunt Sis, and it is printed onto a fabric sheet. I have already soaked it in water to make it soft, and it is ready to sew. I think Aunt Sis is beautiful, and she and I share the same birthday. She lived a long life and passed away when I was very young, so I hope to do something special with this special photo of her. 


There is also a glittering cross-stitched angel on my desk that I am about to finish, and I am excited to finally complete this project too! I just have to cross-stitch her legs, golden shoes, and do a little outlining. She is going to be sewn into a wall-hanging tapestry--and it's about time because I started this angel over a year ago!

I was also sew happy to get the new Martha Stewart Encyclopedia of Sewing and Fabric Crafts for Christmas! I was excited and surprised. It comes with a CD so that you can print out all the patterns--and I'm already having fun looking through it and checking some of my sewing techniques. Yay Martha!!

I have been doing a lot of cleaning up and re-organizing around my craft corner, and I have so many projects in the que, I need to make a list of them, so it can all just stay neatly put away until I get to it! I now have a master project list, which details everything going on with each project.

Oh, and I have to show you one of the sweetest gifts I received...a handmade zipper bag which is perfect to carry around some portable craft projects. It was created by a college student I know, who took her first sewing class this fall and has became an amazing seamstress. I have learned from her! The sheet music fabric is ideal for me, because I have started practicing violin again! It's fun, but at my age I have forgotten all the muscles you use to play an instrument, so I am not only getting my playing skills in shape, but my playing muscles too!


Of course, I couldn't get anything done without my helper Minnie!


Friday, December 24, 2010

Merry Christmas Fudge


Creamy, Chocolately, Traditional Christmas Fudge!

INGREDIENTS
2 tablespoons butter
1 1/2 cups sugar (I substitute 1/2 cup sugar for Splenda to lower the carb count a little)
2/3 cup half and half
1/4 teaspoon salt
2 1/2 cups mini marshmallows
1 1/2 cups semi-sweet chocolate
1 teaspoon pure vanille extract

DIRECTIONS
In a large heavy saucepan, bring the butter, sugar, half and half, and salt to a gentle boil over medium heat, stirring constantly. Let it continue to cook and gently boil for four minutes and stir constantly (don't walk away!). Remove from heat and immediately stir in the marshmallows, chocolate and vanilla, rapidly stirring until marshmallows are completely melted in. Pour into an 8-inch square pan and chill until firm. Makes two pounds of heaven!


The Christmas cactus is in full bloom--Christmas is almost here! 
Peace, joy, and happiness to you and yours.


Monday, December 20, 2010

Nutcracker Love

Once upon a time, a little girl dreamed her Nutcracker doll became a prince.  

And, by the way, they were awesome ballet dancers! That's why we've always loved the story of the Nutcracker, set during a Victorian Christmas time. My daughter grew up dancing ballet, and performed in the Nutcracker every December for several years, and that's when we began collecting Nutcracker dolls!

It all started with a few of the regular soldier guys, then I found a cute sewing bear Nutcracker--I have no idea what that had to do with anything! Then, of course, we collected Clara and the Snow Queen--one of my favorites. One year my husband got me Cleopatra--mainly because she has a black kitty by her side, and we had a black cat, Jack, who lived to be 18, so Cleopatra Nutcracker is a memory of our sweet Jack. Every year we added to our collection...short fat ones...tall skinny ones...a variety of themed Nutcrackers...and now we bring them out every December.

My nephew with our huge Nutcracker!
A few years ago, I was at a department store and found an adorable, huge, oversized Nutcracker. I thought he would be perfect for the entry way. He was holding his own Nutcracker! But then I noticed, the little Nutcracker he was holding had a broken arm--and this was, of course, the last one. He was on sale too! So the manager basically gave me a $75 Nutcracker for $15. I was excited. I couldn't seem to repair the little arm though, so I took off both arms and tied a big ribbon around him! Now he looks like he's holding a little Nutcracker present, and I was happy with my little repair. Although Nutcracker dolls are not really toys, all the kids in our family love getting one, and they bring them out during the holidays. But the tall skinny purple sequined Nutcracker, which we bought one year from the ballet's boutique, stays out in our daughter's room all year! 


Our Nutcracker Collection grows every year!


I am so in love with my Nutcrackers, I also stitch them! I have cross-stitched many of them, and given them away as ornaments. I did not design the pattern that I use--but if you can find one, you can stitch them up in an evening.


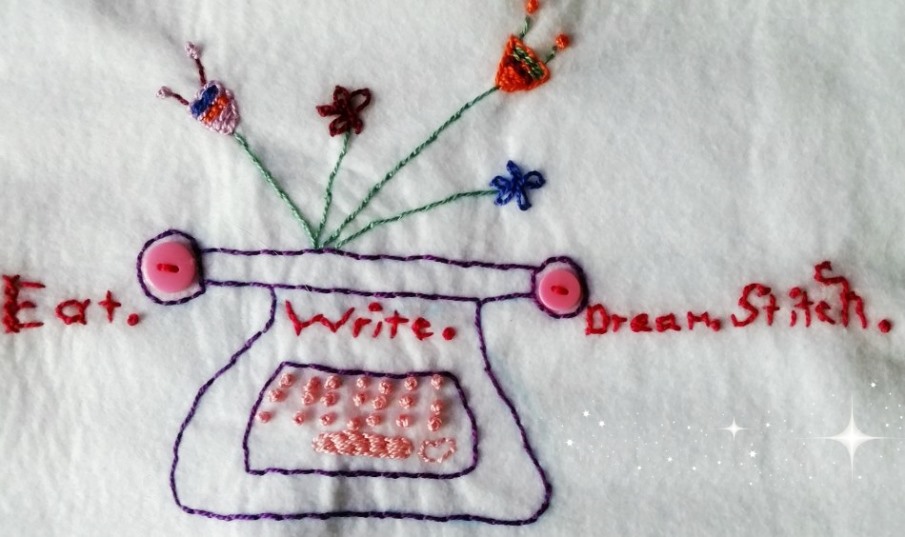
Eat, Write, Dream, Stitch and Celebrate!


Tuesday, December 14, 2010

Beary Merry Gingerbread House


Welcome to our gingerbread house! It's a fun tradition that we started years ago, and we love it as much as the kids in our family do. My gingerbread houses are not painstakingly over-the-top, and I don't make them for competitions. In fact, they are like little rustic cottages, and I use whatever candy we have managed to gather up to decorate. Some years are more elaborate than others. This year, all I had was candy canes, Teddy Grahams, Lifesavers, mini marshmallows, and offbrand M&Ms (which are a bit bigger--but taste awful!).
The gingerbread madness started several years ago when I was searching for a simple-to-do recipe. I found one and from there sort of developed my own version. I cut wax paper templates, and keep using the original ones! If you've never made a gingerbread house, this one is pretty easy. Start with Day 1 - the baking.
DAY 1--BAKING THE GINGERBREAD PIECES
Ingredients:
5 cups all-purpose flour
2 teaspoons ground cinnamon
2 teaspoons ground ginger
1/2 teaspoon ground cloves
1/2 teaspoon baking soda
1/2 teaspoon salt
1 cup vegetable shortening
1 cup sugar
1/2 cup molasses
2 eggs

Egg whites and powdered sugar make the frosting.
Directions:
Combine the dry ingredients in a large bowl and set aside. Beat together shortening and sugar until creamy. Add eggs and molasses and beat until fluffy, then slowly add the flour mixture and mix until the dough is smooth and starts to pull away from the sides of the bowl. Divide the dough into three larger balls and one smaller. Place one ball of dough on the back of a cookie sheet and roll out with a floured rolling pin. Keep adding flour to your rolling pin as you go. Roll out to about a 1/8-inch thickness and use wax paper templates (measurements for those are below). Use a sharp knife and cut out two front/back pieces, removing excess dough. Cut out a front door. Bake 10-12 minutes or until lightly browned around edges. Cool slightly and move to wire racks to cool completely. Repeat with another dough ball, cutting and baking two side pieces. Optional: cut windows and fill with crushed lifesavers and bake for a stained glass effect. Bake the two roof pieces, and one base piece.
Front/back piece
Because we do not make our gingerbread house to actually eat, I let the pieces dry completely on wire racks overnight, so that they are nice and hard before we begin decorating.
Front/back template: 5X6-inches, 7.5" from bottom to roof peak (bake 2)
Side template: 5X7-inches (bake 2)
Roof template: 5X8-inches (bake 2)
Base: 7X6-inches (bake 1)

DAY 2--DECORATE!
 Frosting:
4 cups powdered sugar
3 egg whites (or equivalent in egg white powder)
Beat with whisk attachment in mixer until smooth and stiff--you do not want it to be too runny. If it is, add more powdered sugar until you get the consistency you want.
Fill your pastry bag with the frosting. Get out your candy assortment and you are ready to decorate! You should have enough leftover dough to also make some little gingerbread people, and I always make reindeers and put one on the roof!
Especially when children are helping, it is much easier when you are ready to decorate to place the pieces flat on a cookie sheet and decorate them flat, and then let them dry overnight.

DAY 3--BUILD YOUR HOUSE!
Time to make another batch of frosting and "glue" the house together. One of the things that helps me when assembling the house is to use a few straight pins to keep it all together as I go--not many, just a few. Just keep assembling, piece by piece, and adding frosting where you need one piece to stick to the next, and if there are any gaps, just keep filling them in with frosting. My final touches are adding Lifesavers and a reindear cookie to the top of the roof.

I have baked a whole set of pieces now, waiting for the little boys in the family to decorate this week--they love making gingerbread houses every year, and we let them decorate however they want! I'm thinking about making another one too with all "stained glass" Lifesaver windows. Now, I can't say it isn't a bit of hard work--anytime you are rolling out dough, that's a workout--but it is fun and so worth it to have that wonderful gingerbread aroma around all during the holiday and these little cottages are fun to look at. This year, I broke one of my roof pieces (had to bake another) so I trimmed out a little bed to put inside for the Teddy Grahams! I glued it to the base piece and cut out a tortilla blankie! My little nephew loves to look in the gingerbread windows and see little bears inside! My teenage daughter even told me how much she enjoys our gingerbread house tradition--so it's never too late to start making your own!


It's still "drying" -- Oreo front steps were a last-minute addition!


From our house to yours--Merry Christmas!


Tuesday, December 7, 2010

Fresh and Simple Christmas Cranberry Sauce

Making fresh cranberry sauce makes me feel like I'm doing something really good. I don't know why. It just tastes good, and makes everything on the plate more festive. My advice is to avoid those cans of jellied cranberry which are PACKED with sugar and syrup--and make your fresh stuff the night before. You will love it. Also, if you are watching carbs, you can easily cut down on the sugar content. Try this recipe. When I have a table full of family and friends or if I plan to serve it on my open house buffet table, I double the recipe.

FRESH CRANBERRY SAUCE
12 ounces of fresh cranberries, rinsed
1 cup of sugar (OR 1/2 cup sugar and 1/2 cup Splenda)
1 cup water
1 teaspoon fresh orange zest
pinch of cinnamon 
pinch of nutmeg

DIRECTIONS 
Bring water, sugar (or sugar and Splenda), and spices to a boil over medium heat. Add cranberries and bring back up to a boil. Lower heat and simmer for about 30 minutes until the water has reduced somewhat. Ladle into a bowl and refrigerate.
Make it the night before--the color is beautiful!


Santa is taking his bath and getting ready! 
What are you dreaming of for Christmas?


Monday, December 6, 2010

Wear a Little Christmas Cheer

Ever since I saw someone wearing a little Christmas tree pin one year, I wanted to make some. These are nothing new to the crafty blog world, but I still have to share my little Christmas tree forest of pins. I think each one takes less than 20 minutes to stitch up, and it's a great way to use up your scraps of felt from other projects--you can make your Christmas tree pins in a rainbow of colors. Looks like I need a trip to Hobby Lobby for more green--or maybe I just need to make another order as much as I'm loving these felt projects.


I start out by cutting out several trunks from brown felt--this takes about 1 minute if you use a rotary cutter. Then I cut out my colorful triangles for the trees with pinking sheers.

I stitch my safety pin on what will be the backside, stitching the stationary side of the pin--and then I go ahead and stitch the trunk on. Using a contrasting color of DMC floss (I apparently like green a lot) I stitch the front side of the tree onto the pin, making sure the floss lands in all the grooves of where the pinking sheer cut. Before finishing, leave a little opening and insert a teeny bit of fiber fill, then finish stitching. And that's it! I think you could easily make a couple of dozen in a day!
 
I'm still enjoying my little birds!
It's my goal to make the most of every day of the Christmas season. My church choir had the joy this weekend of singing in our annual Christmas concert with the Annie Moses Band--they are an incredible family group of chamber pop instrumentalists, singers and songwriters. They not only blessed me in so many ways, they completely inspired me to dust off my violin! Talk about dreaming big! So here we go...someone my age, reuniting with her violin. I almost think an endeavor like this is blog-worthy! I will try to share my progress, no matter how pitiful! In the meantime, if you ever have the opportunity of seeing the Annie Moses Band live, I highly encourage it. Happy stitching!