Wednesday, October 28, 2015

WOYWW 334--Getting together my Listers Gotta List

Over on the left pullout are my most often used stamps
I don't know why, but I often tend to arrive in the middle of things. Case in point, the lovely Listers Gotta List monthly challenge hosted by The Reset Girl. This has become such a popular thing on Instagram and they have a Facebook group, so why do I decide to try it out on the 21st of the month? I have no idea. But I really wanted to do it so I made a quick booklet for it to add in my Midori. It's just thrown together from a pad of everyday yellow lined paper. I trimmed it and added the cardstock cover, bound it in the center at the top and bottom with elastic, decorated the cover with patterned paper and washi and packing tape, and I was ready to go! Making and decorating a list is relaxing and makes me happy, so why not try the challenge.

And by the way, happy What's-On-Your-Workdesk-Wednesday! What's laying around on your workdesk in the middle of the week?

Also laying around on my desk is a stack of the cutest free stickers they put in our bag at Burger King one day! I'll take 'em! I love using stickers in my planner lately. I've also got the texture boutique out. If you look at my post on my blog from Monday you'll see I've been keeping the ole punches handy for some quick little diecuts, and those little diecuts also look super cute when you emboss them. I know my Big Shot embosses, but when that's all you need to do, the texture boutique is just little and handy! Oh, and I've also come to realize that my 7-inch tablet fits right in the front pocket of my Midori--loving it. So when I don't feel like lugging the tablet in the big cover with the keyboard, it all makes a nice package right in the Midori.

Have a happy week.

Eat, Write, Dream, Stitch


Monday, October 26, 2015

Remember to Upcycle Your Scrap Paper with Your Old Punches

Only have ten or twenty minutes at your craft desk? Grab some of those punches you bought long ago, some scrap paper, and make dozens of diecut embellishments. Keep them handy in a little sectioned organizer box--like the kind you can get at the Target dollar spot for example. You won't need to buy diecuts when you have your own around to decorate scrapbook pages, cards and planners.
I remember when those little punches were all the rage for scrapbookers and crafters...but then we moved on to our diecut machines and left our punches in the dust. They are still so handy when you only have a few minutes and some scrap paper lying around, so let them help you make the most of your craft table time, and upcycle those scraps too. If you have a tray or a cookie sheet where you keep your patterned paper scraps, keep a few punches in there and it will always be ready to go.

Visit my original Stash Dash 2015 right here.

These little organizer boxes are perfect to keep diecuts in.
Eat, Write, Dream, Stitch
 

Thursday, October 22, 2015

Decorating Planner Booklets for Your Midori

The reason I love Midori traveler's notebooks is, of course, all the booklets you can carry inside! The booklets may be planners, listy books, art journals, or anything you need. Whether you make your own or order your booklets, they start out pretty plain. And they are fun to decorate. Recently I got out my planner booklets I downloaded from a free website and got to work decorating the 2016 booklets. They give me six months in one booklet in a weekly format.
You will know what you like when you start playing around with your papers, stamps and stickers.
 When you make or receive your Midori booklets, just get out your favorite patterned papers, scraps, stash, and start having fun. I use stamps, washi, stickers, and journaling cards too. I like to use different patterned papers on the front and back covers. After measuring them to fit the cover, using the booklet itself, I glue them on, and then add washi tape to the spine.
After I finish decorating, I add packing tape to laminate the spine and the front edge so that my booklet won't get frayed or come apart over its months of use.
I used letter stamps for the planner cover
 Then I worked on the inside cover. I look at my planner every day, so I like using my favorite papers and themes. I had these Lucy stickers, and once I decided to go with Vitametavegimin, I had a little 50's advertising theme going for this inside cover. I used some clippings from my mothers vintage Workbasket magazines and they were perfect, and also remind me of my sweet mother.
Inside front cover
 You can just have fun with your scrap papers, sparkly washi tape, and stickers. I always love a good cupcake sticker too!
The inside back cover of my planner
 Decorating the booklets is as much fun as using them I think! It's a great way to use your scraps and paper stash, because anything goes. Make what you want to look at all the time.
 Click here to see a recent walk-thru in my Midori.
 
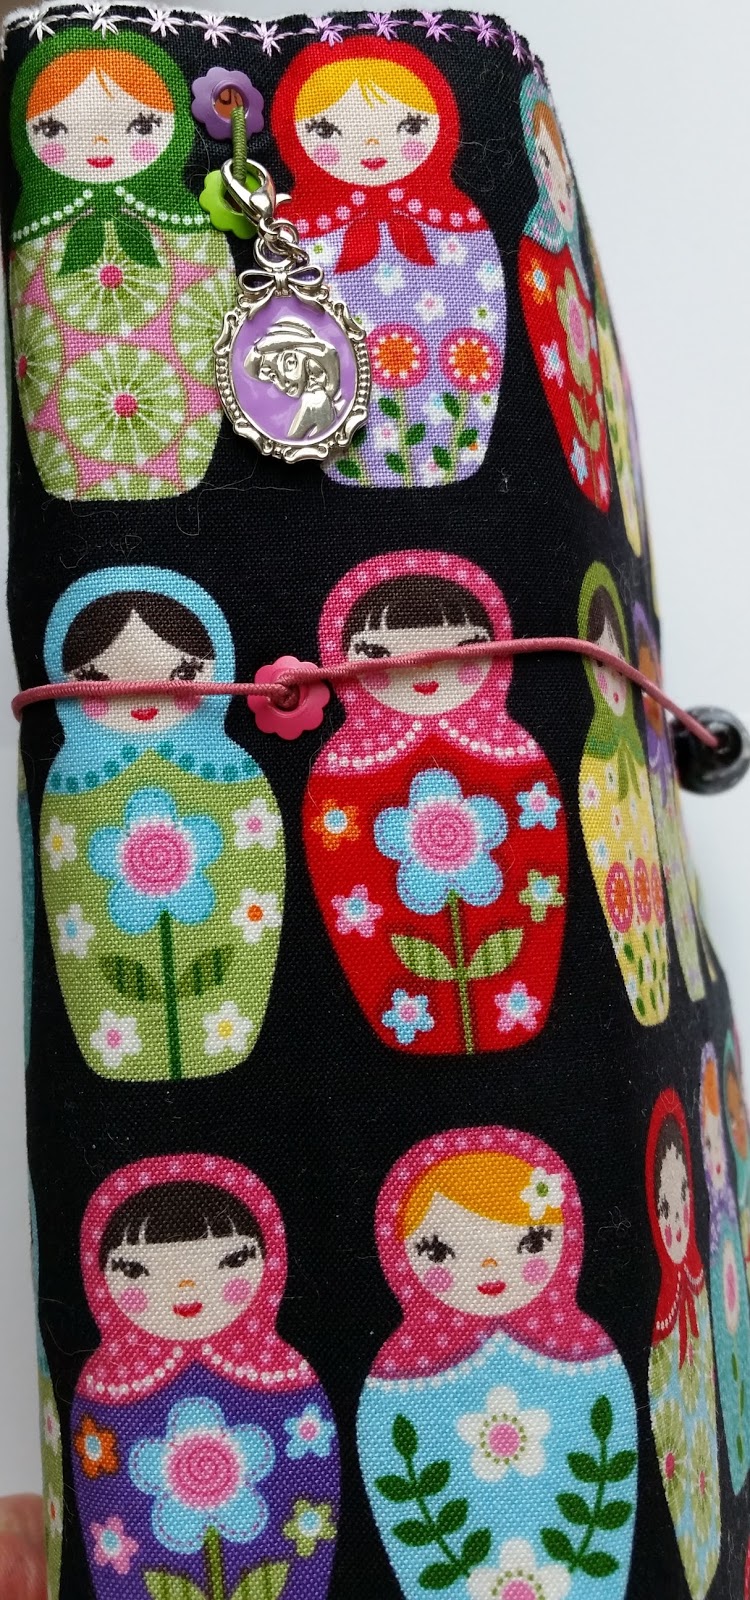
I made a Stitchydori with my favorite matryoshka doll fabric!

Eat, Write, Dream, Stitch


Wednesday, October 21, 2015

WOYWW 333--Wonky but Cute

Watching YouTube videos on my tablet and decorating dori books.
My poor sister gets one of the wonky ones! I'll explain...but first, welcome to What's-On-Your-Workdesk-Wednesday where we link up with deskers all over the planet courtesy of Miss Julia.

So...when I first started stitching Midori-style traveler's notebooks, the first few were a wee bit wonky here and there. I think you know what I mean if you're a sewist. For example, one of my friends made her own wedding dress, and it was wonky, although super cute. So she made the second one more perfectly, and used the first one to wear into the ocean for some of the photos. You couldn't tell it was wonky in any way in the photos, of course, especially when soaked in the ocean, so that was brilliant, and her perfect version stayed perfect.

So while I'm not going to photograph my Stitchydori's in the ocean, I don't feel I can sell the more wonky ones either, although they are super cute, and thus dear little sister got a wonky one. BUT, she doesn't seem to mind and that's my desk up there in the middle of me making some cute booklets for her Stitchydori, so there you go. I think my favorite thing might be making the booklets. I'm trying get her more organized, so this is her test to see if she will start using a planner.

I'm starting to decorate my 2016 planner booklets, so I'll be posting about that tomorrow. And after I get out of my morning meeting, I plan to visit some deskers this afternoon! Have a lovely Wednesday.

Eat, Write, Dream, Stitch


Monday, October 19, 2015

A Little Crafty Haul on the Weekend

Here is what happens when you spend a good part of 2015 upcycling, recycling, repurposing, and using up your stash...you run out of something! And that's a good thing right? So when darling daughter needed some colored pencils I wanted to see how far a small amount....$25...would go at the ole craft store. With tax, in all, I spent 27. but not bad I'd say. The fact that everything I got was either on sale or bought with a coupon made all the difference.
The patterned papers and paper pads were all 50% off, so I was immediately drawn to this gorgeous 12X12 pad called Simple Stories. It has a bit of Disney to it, and I like that, and I especially love the bold gorgeous patterns and colors which I desperately need in my stash which had way too much floral in it! The nice thing about this pad is that it has some great variety and it doesn't necessarily have to go with Disney things, but it would be perfect if you were scrapbooking your Disney World trip! My favorite pattern in here is the cameras with the hearts. So cute.
Since it was all 50% off I had to get a couple of 12X12 sheets of an adorable heart pattern and a 6X6 pad. This one, called My Mind's Eye, is double-sided paper which I love, and has plenty of shiny foil in the patterns which makes it magical. I'm already using some of it to decorate Midori booklets.
Besides the papers, some cute washi, the colored pencils, and the adorable cupcake stickers (on the really nice sticker paper) I couldn't resist this sewing stamp set. 


I have been wanting a sewing machine stamp forever. It wasn't until I got it home that I realized it also had a button in the set, and I actually needed a button stamp for a project! That was a win-win. I'm going to keep trying to resist being a craft shop-aholic, but my list is getting longer for the next haul! The main rule is, I can't buy it unless I have a place to put it. And I have a lot more room in my patterned paper storage caddies now, so I don't feel guilty at all.

Click here to see my original declaration to use up my stash this year.

Eat, Write, Dream, Stitch


Friday, October 16, 2015

Stamping on the Go - Art Journal Friday

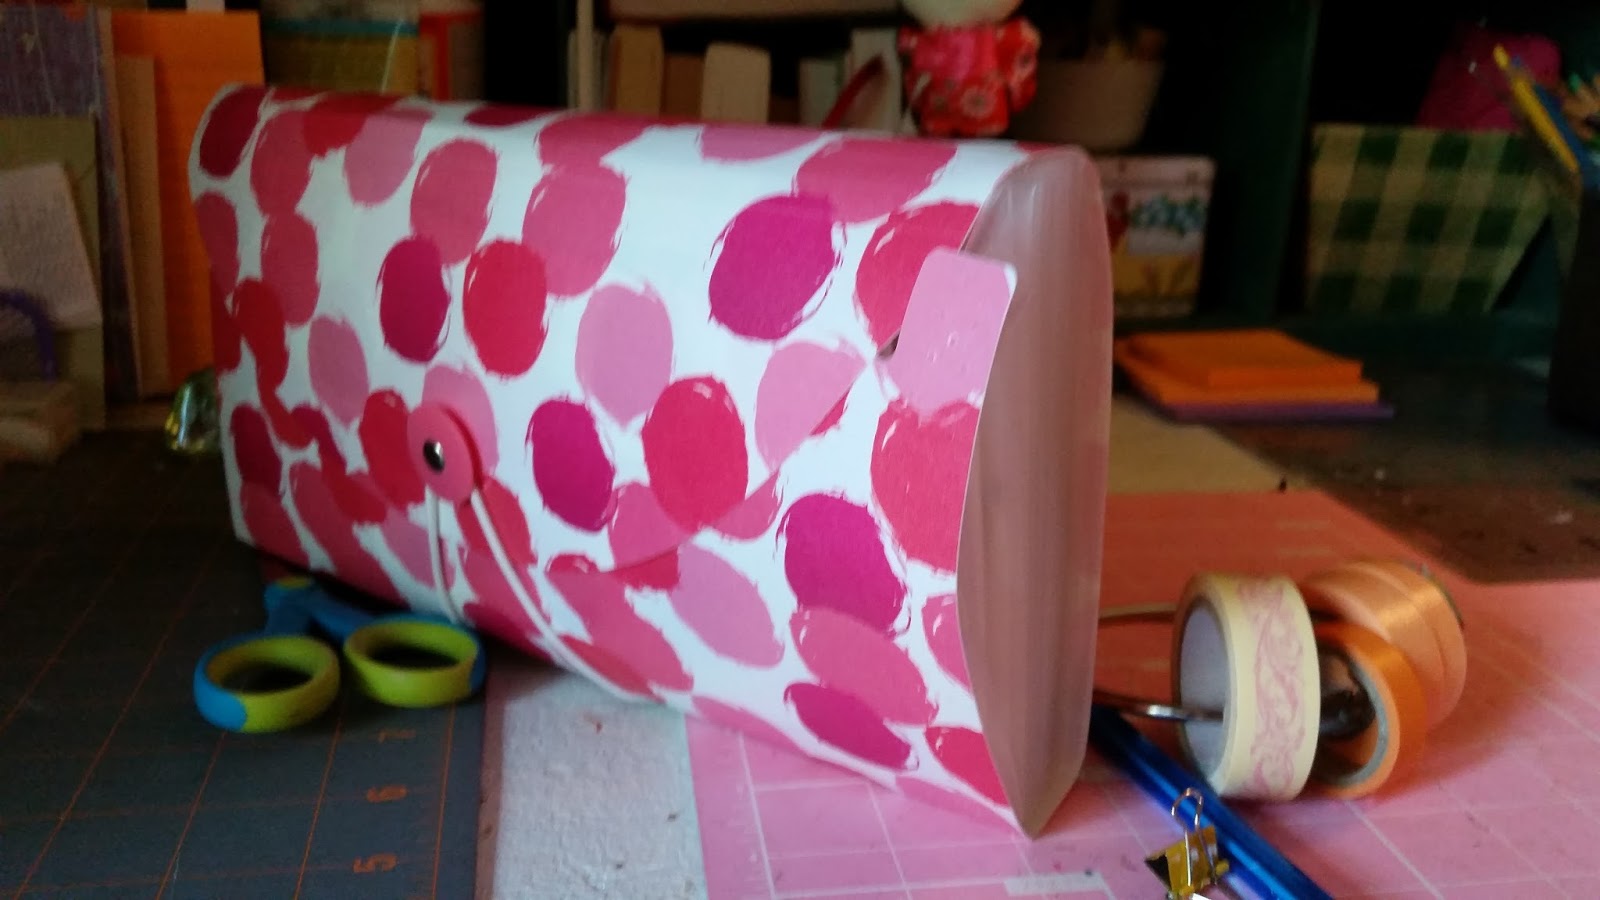
There is no reason why your stamps shouldn't travel with you, whether you're going to the office, a crop, or a getaway. On this day I wanted to do a little art journaling and stamping in my Midori Traveler's notebook, during the day, so I found this little makeup bag perfect for taking a couple of ink pads and a few stamping supplies because it zips all the way open. Just what I needed!
The bottom was not even expanded all the way with the supplies I packed, so I know I could get more ink pads and stamps in here!

 
I've been quite obsessed with my "dolldori" lately, and I love the art journal booklet I made for it out of watercolor paper, because it will take any medium. I've never doodled sugar skulls before, so for this October, I want to make a lot of flowerly sugar skulls!
My Dolldori
 If you'd like to see a flip-thru of my homemade fabric Midori Traveler's Notebook, click here. I use it for planning, listing, and art journaling. It's like your life wrapped up in one book!

Eat, Write, Dream, Stitch

Wednesday, October 14, 2015

WOYWW 332 - Hot tea, fabric and paper

So there I was...watching "Ladies of London" which is kind of like a Real Housewives London version and I had the biggest craving for hot tea with milk and sugar! Annabelle was drinking some with her granny, and so I paused my program and made a big mug. It was soooo good. Reminded me of my childhood.

I love the Ladies of London.

I also love What's-On-Your-Workdesk-Wednesday...the best desk party on the planet.

Anyhoo, I've been busy trying to get my paper scraps and stickers organized. I kind of blogged about that on Monday. After getting them sorted and put away in the accordion file, my desk is suddenly clean for a minute!


And I'm still stitching on Midori travelers notebooks, and getting some heart and flower diecuts done. I'm looking at my Mary Engelbreit fabric and Santa fabric to decide how many I can get out of what I have!
Still crazy about my matryoshka dolldori!

Hope you're having fun with your paper and fabrics.

Eat, Write, Dream, Stitch


Monday, October 12, 2015

Magical Monday Organizing - Stash Dash 2015

Coffee + Planning = Magic
Isn't organizing a magical thing?
I hope so, since I spent my extra time this weekend trying to get scraps of paper, this and that off my desk and into a place where I could find what I need when I need it.
After you're all done it does indeed feel like you waved your magical organizing wand. Ahhh.

The thing which started all this was very simple: one of those accordian files from the Target dollar spot. Yes, it cost one dollar!

I didn't know what I was going to use it for, and then I realized. It's the perfect size for the little pieces! Stickers, scraps, die cuts, etc. These are the things I use all the time for my planner, scrapbooking, art journaling, tags and cards.

When I cut up a pretty piece of patterned paper, I like to use it all. What has been happening is, those little scraps I'm not using right away get piled up into a tray. Lately, that tray has been out of control! Enter the dollar accordian file.
 Once I started sorting my scraps and bits and bobs, it was very clear what my categories should be. The little file came with a label sheet for the tabs. I decided that my labels did not need to be in alphabetical order -- I'm such a rule-breaker! Instead I put them more in the order of how I would use them. I put the kiss-cut store-bought stickers under the general tab of "stickers" and my planner stickers, which I usually download from somewhere and print on a shipping label sheet, under the tab "planner stickers." Then I had some cardstock scraps which were nicely trimmed, some were die cut, and others were clearly just scraps and they were sorted accordingly. Here's how it ended up looking.
 I plan to die cut lots of flowers and hearts soon, so I made a section for those. Nice, eh?
Kiss-cut Stickers, Planner Stickers, Scraps and Diecuts all organized!
I packed this organizer full to the brim, and yet it still closes up very nicely! It fits right into one of my cubby shelves, so it is at the reach for any project. It would also travel well. Mission accomplished.

So here we are in October, and every month I've made an effort towards the 2015 Stash Dash I started way back in January, tips and all. You can see it here: 2015 Stash Dash

 I've upcycled, recycled, repurposed, and tried to make the most of what I have. This year I've probably done the least craft shopping ever. Once I get my latest project, my beautiful stitched Midori Traveler's Notebooks finished and selling, you can be sure I'll be doing a Michaels-Hobby Lobby-JoAnn run (they are all within a couple of miles of my house, I literally could run!). But I think this time, I'll be a smarter craft shopper--buying what I'll need and use, and not what will collect dust in my stash.

Eat, Write, Dream, Stitch


Wednesday, October 7, 2015

WOYWW 331--I Heart Paper and Fabric

Visit What's-On-Your-Workdesk-Wednesday at Miss Dunnit's place and share your craftiness or non-crafitness in action!
Here's a view of my craft desk this morning and what's all around it. I've been diecutting at the ole Big Shot with the really thin dies. I love these squares and have been making a lot of them for different projects. Fun! My big fat beautiful Midori Traveler's Notebook is laying there...I call it a stitchydori because I stitch them myself. I think they are fun to put together and I even love making the booklets for the inside. Mine can hold six booklets! Visit here to see the little updated walk-thru in my Midori if you are interested in these fun traveler's notebooks. It just combines my love of fabric and paper!
 
I love this Sizzix set of scalloped squares

Also there is my basket of knitting, my most used stamps and ink pads I keep in a repurposed makeup bag, my tablet, a tray of paper scraps, and a stash of planner stickers.

 And can I just say to everyone across the pond who already gets to see the new season of Downton Abbey...I'm jelly of you!! I miss my castle!

Now I'm going down the list at the desker party to visit a few. I hope you have a wonderful week. I am pretty sure I've found a craft fair to go to this weekend. Yay!

Eat, Write, Dream, Stitch

Monday, October 5, 2015

Planning...Listing...Doodling and Decorating in My Midori

I have called it a Midori, Fauxdori, Dolldori, and Stitchydori -- but whatever it is fits me perfectly in every way. And it's like having both a personal assistant and a muse.
Stitched with matryoshka fabric plus a little doll bead on the elastic
Classic Midori Travelers Notebooks measure 4.33X8.25 inches, are made of leather, bound together by elastic and can hold anywhere from one to six booklets.
Backview shows off the pen loop stitched in with a piece of elastic, and how I left on the selvage edge of the fabric.
I stitched up my own Midori at first and realized it wasn't fat enough for me! I love using my favorite fabrics, lining them with felt, embroidering in them for wearable art, and even making my own planner and booklets for the inside. So I didn't mind taking the matryoshka fabric I love (for my "dolldori") and trying out the bigger size of 6-1/4X9 inches. After a month, the results are in:
     I LOVE this bigger size
     I LOVE planning in my Midori
 
I decided to punch all the holes in the spine--I added another charm at the top

I like the larger size because I stuff my Midori fat with five booklets, a six-pocket folder, a clear plastic folder and a dashboard. That's a lot. But it makes me feel like my planner and craft room and listy notebooks go with me everywhere. My Midori has two elastic straps.

Here are the first three books on the first strap.
Inside front cover pocket - and my weekly planner
 
First book: Weekly planner - six months at a time

A planner page with lists, to-do's, some stenciling, stickers, and daily prompts for a Midori Instagram challenge I was doing.
This was a free downloadable planner and it was fairly easy to print up. I make my covers with plain white cardstock and decorate them with stickers, scraps and diecuts, and protect them with washi tape and packing tape.
I do have more than one planner--like a lot of planner girls. I think I'm one of the original planner girls, I just didn't know it. Anyway, my dori planner has really become my go-to planner. I like to write down my usual planner things, but then when I'm doing that there are ideas and thoughts that belong in other booklets, and I can go right to them, yet keep it all together. The nicer lettering is done with stencils I keep right in my Midori, purchased off Amazon. I've also used washi tape to tip in some food journaling sheets in the back of my dori planner--so far, I'm sticking to it!
Junky listy book front cover
Book no. 2 is made with multi-color lined pages. I've put a table-of-contents in all my booklets and this one is dedicated to ideas for my side hustles, like my Etsy shops, writing and craft selling.
My junky listy journal
I call book no. 3 my junky listy journal. I made it from a pad of yellow lined paper, and it's a shorter width than the other books' pages, but perfect just for all the lists I keep. You know you're a major lister when your lists have a table-of-contents!
You can see where the two straps are here--Art journal front cover

Inside my Midori art journal

 The first book in my second strap inside the Midori is the art journal I made out of watercolor paper. It can take wet and dry medium and plenty of sticking and gluing...that makes it my therapy, my yoga, and a way try out ideas for all my arts and crafts.
Triple duty dashboard--front cover

Dashboard inside cover and six pocket folder inside

Another angle of the folder inside the dashboard
Clear plastic folder inside six pocket folder--also where I keep my stencils
Dashboard back cover with swingout washi tape pallet
The second book on my second strap does triple duty. It is a dashboard folder (laminated so it's a place for extra post-its) and inside is a six pocket folder (made with a tutorial on YouTube) and inside that is a clear pocket made from colored pencil packaging. On the backside of my dashboard folder I hinged a washi tape pallet using my crop-o-dile and a grommet. I cut and upcycled an old plastic planner cover to create my pallet so that I can keep washi tape samples inside the Midori. Is that the hardest working dashboard you've ever seen!
Last booklet: A place for quotes and thoughts
Inside back cover is embroidered - wearable art!
My last booklet is a place for random quotes, thoughts and inspirations. When I need a boost, I go here. When I can give myself a future boost, I go here.

I like the feel of lining my stitchydori's with felt, and for my own dori, I took the time to embroider for the inside back cover. It says, love your life and it has my signature typewriter with the flowers. When I open my Etsy shop or sell dori's in a local shop, some of the stitchydori's may have applique or embroidery on the inside back covers. They will all be unique and one-of-a-kind. My goal is not to be a manufacturer, but a creator.
My one-of-a-kind dori with the selvage edge on the back, and trimmed in machine embroidery
And that's the end of this doribook. Stitching my own Midori meant doing whatever I wanted, like leaving the selvage edge on the back of the fabric (I'm a weird sewist who loves the selvage edge!), and embroidering what I wanted, and putting the grommets in the best place and adding the charm and bead and places for my quatro pens. Once I started trying it out, I quickly arrived at the best way to package my life-in-a-dori. Making and decorating my own booklets just makes me happy, the way scrapbooking and art journaling make me happy. Just good art therapy for the soul.
Yes, I also made a matryoshka bracelet
I like it so much I'm creating more, just for fun, with owl fabric, Mary Engelbreit fabric, and a Santa Clause print that's super cute for Christmas time. I don't know how I got hooked on this, but I think it started with my journey for planner peace and ended up with Midori peace. It's like stitching and scrapping combined.

That's why art and crafts can change your life. Future plans include making a floss and needle holder for my Midori for cross-stitching on the go. There's no end to what you can put in your Midori, if you're creative enough.

Stitch happy!

Eat, Write, Dream, Stitch