I don't know if I have to tell you how a Midori Traveler's notebook can be your best friend, personal assistant, organizer, art journal and planner...but you may already know! I love making my own Midori style notebooks from the covers to the inside booklets themselves. And even if I order a booklet for my Midori, like I did recently from Yellow Paper House on Etsy, I will also decorate it with my scrapbooking supplies and make it one of a kind.

So this past weekend, I was in the mood to make a real leather Midori style notebook, and I knew my leather source would be a 30-year-old Coach bag that I had never let go of. (I'm all about upcycling) When I graduated from college and got my first job, I really wanted a nice bag, and Coach was the thing in the 1980's. So I have never let go of my first Coach bags, and my big brown one was well-loved, let me tell you. WELL loved! I was running from the beach in a rainstorm one day when I got a huge watermark on my bag, and it never went away. That whole side of the bag looked especially loved with more than one watermark and wear on the leather, so that's the side I cut first to make the Midori. It measured 9X12. Perfect for cahier size. My next question was, what to do with the love, the watermarks, and the imprints where the bag handles had been. I would have loved it to be just a perfect piece of leather...cut it...put in the grommets and done! I certainly could have just left it with all the love and imperfections--nothing wrong with that! But the more I thought about it, the more I actually wanted to applique where the handle had been and add decorative stitches. But could I sew on this leather? And sew, I did.
 |
| Well loved leather bag reborn into a newly loved Midori |
 First I cut out the whole side. Then I took a seam ripper and took off the handle. I took my ruler and rotary cutter to straighten up all the sides and then I put the approximately 9X12 piece of leather in my sewing machine and put a decorative stitch all around the edge, first with some red embroidery thread, and then with a purple variegated thread. I loved it.
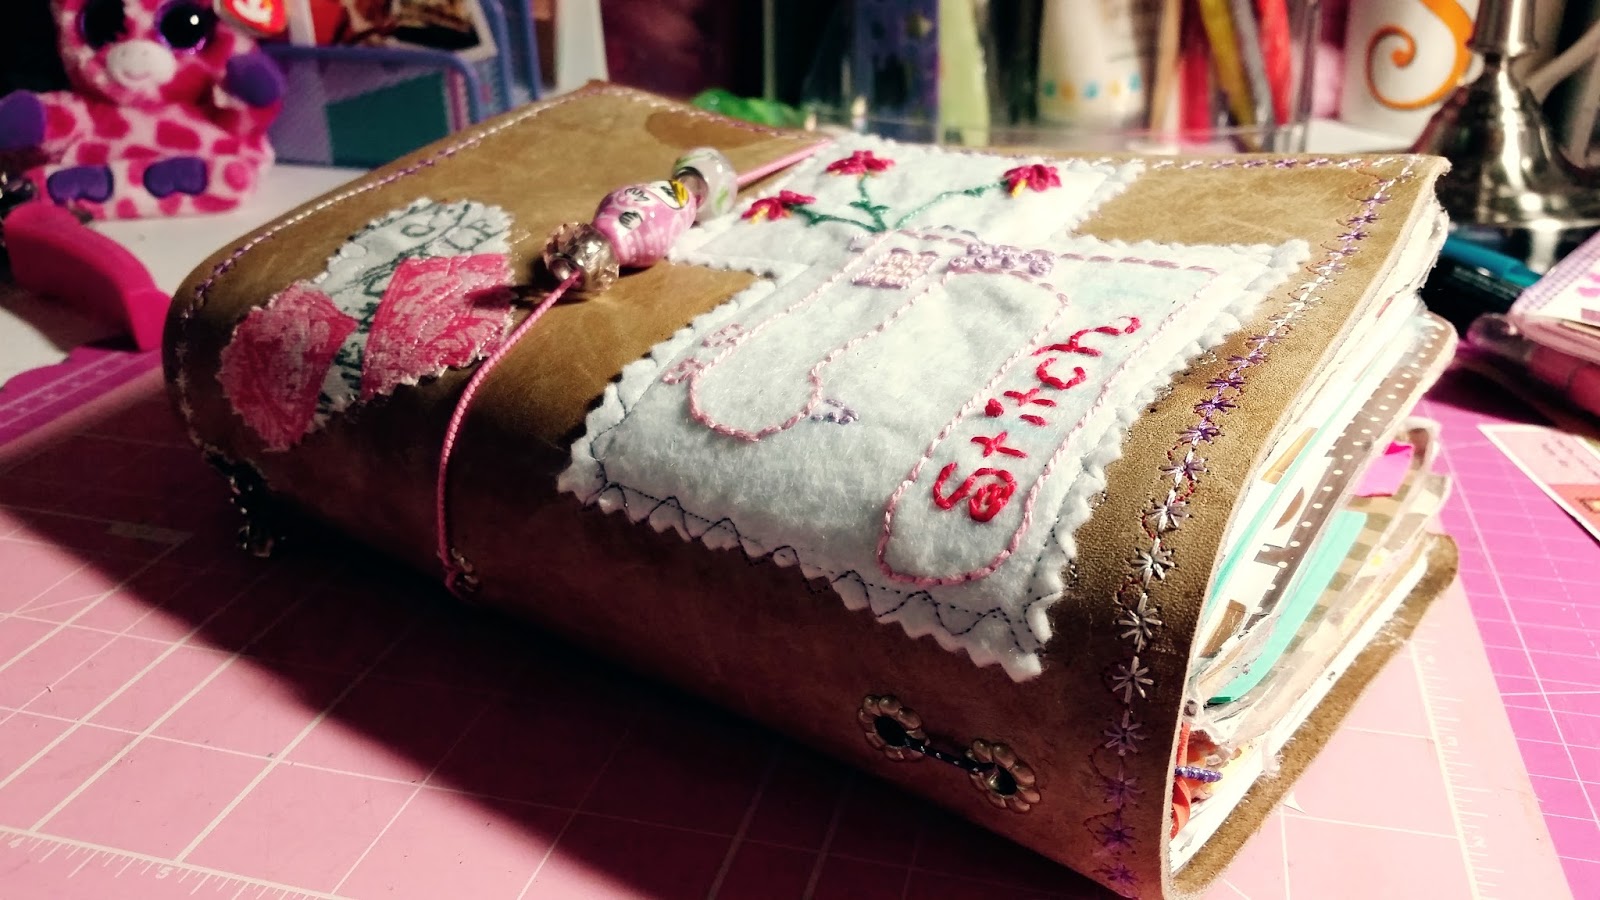
I looked around in my stash for what to applique. I'm always embroidering on pieces of felt, and I'm always cross-stitching something. So I found an embroidery to applique to the front cover, and some fabric to make into a heart, to cover a little cut in the leather on the front cover, and then a matryoshka cross-stitch for the back cover. Of course, I have to have a matryoshka doll on there somewhere!
First I cut out the whole side. Then I took a seam ripper and took off the handle. I took my ruler and rotary cutter to straighten up all the sides and then I put the approximately 9X12 piece of leather in my sewing machine and put a decorative stitch all around the edge, first with some red embroidery thread, and then with a purple variegated thread. I loved it.
I looked around in my stash for what to applique. I'm always embroidering on pieces of felt, and I'm always cross-stitching something. So I found an embroidery to applique to the front cover, and some fabric to make into a heart, to cover a little cut in the leather on the front cover, and then a matryoshka cross-stitch for the back cover. Of course, I have to have a matryoshka doll on there somewhere!
After I had all the stitching done, it was time to add the grommets--one goes in the center back spine, two at the top spine, and two at the bottom spine. This is because I like to have two pieces of elastic on the inside so that I can add a total of six booklets. With such a piece of roughed-up well-loved Coach leather, it was fun to add these decorations, and it made me want some pink sparkly elastic for the closure with some cute beads added.
 |
| Appliques all stitched. |
 |
| I use a piece of 18-inch elastic and thread it in double and tie a knot. |
 |
| You can see on the inside cover where the handle had been! |
I have to say, making a fabric Midori does take a bit longer than this leather one. There is much more cutting and stitching involved, and there is a liner, more ironing, and I add pockets and pen loops with fabric Midori's. With this one, I will just add a binder clip to keep a multi pen on there. I made a six-pocket folder for the inside with a dashboard, so no pockets needed on the inside cover. (more about the insides in another post!)
 |
| A c-s matryoshka appliqued on the back cover--there's an old stain I left exposed. |
 |
| Remains of the day--the bag, now cut up--there's another good piece of leather! |
Honestly, if the hardware on this bag had held up, I don't think I would have upcycled it like this. But it was just rusty and gross, and now I'll basically be using this bag in its new life every day!
 |
| I add a charm to the back too. |
Although I covered up where the bag handles had been, because I thought it looked odd, I don't mind having all the imperfections in the leather showing. To have a big ole water stain reminding me of running from the beach in a rainstorm when I was young, not bad! Midori's are all about memories and planning for the day and the future. Mine is very personal.
See other Midori posts here:
Making a "baby-dori" from Coach leather
Making and decorating Midori booklets
Stitching a fabric Midori and decorating booklets for it
Planner peace in your Midori
Eat, Write, Dream, Stitch


 First I cut out the whole side. Then I took a seam ripper and took off the handle. I took my ruler and rotary cutter to straighten up all the sides and then I put the approximately 9X12 piece of leather in my sewing machine and put a decorative stitch all around the edge, first with some red embroidery thread, and then with a purple variegated thread. I loved it.