Showing posts with label upcycle. Show all posts

Friday, August 26, 2016

Going on a No-Spend and Loving It

"You can buy happiness...for a little while."
-unknown

Ahhh...shopping...the craft stores...the mall...major hauls on YouTube...the shopping network...Amazon...it's all got to stop. Why? Because Christmas is around the corner. I don't really need anything. I've seen too many episodes of Tiny House Nation. And unless it's a Christmas present it's time to go on a good old-fashioned no-spend. And it doesn't have to be painful either. Just think M-O-N-E-Y.

MAKE IT MYSELF.
Recently I really wanted some cute new little zipper bags. Then I realized, it was a great opportunity to make it myself! I have a fabric stash, I had some zippers, and I'm rubbish at sewing them. So I found a great tutorial on YouTube, and I was in business. These could even be cute gifts. AND...YouTube is good for a lot more than pining away after other people's hauls!

OWE OR UPCYCLE?
If you've been on my blog, you know I make fabric Midori traveler's style notebooks all the time. And I use what I make. But recently I really was pining away after a gorgeous leather Midori I saw in an Etsy shop. I came very close to putting that $70 or $80 on my credit card. But then I looked around my stash for some leather. It came in the form of an old, falling-apart Coach bag from the 1980's. Enough leather in this bag for two Midori's! (one can be sold or be a gift) See? It came down to, do I want to owe or do I want to upcycle!

Click here to see how I upcycled an old bag into a fabulous Midori Traveler's Notebook

"Values are more important than valuables."
-unknown

NEEDED?
The most expensive notebook I have ever bought.

These little accordian notebooks are fun to make from 12X12 patterned paper.
Of course, you know that anytime you buy something you should always ask yourself if you need it. (Groceries and things like that are kind of excluded here. But I do make my grocery list around what's on sale.) Recently I bought this gorgeous pink notebook for myself because it's back to school time, I'm busy, and I needed and wanted a fun to-do listy book. I'm a paper kinda girl. And I saw what I wanted in a bookstore. I thought twice about it. I thought three times about it. And I knew if I walked away I'd keep thinking about it and wish I had it. So I got it. And really, it wasn't that expensive, but still I've never spent more than a couple of bucks on a notebook. It was before my no-spend. I really enjoy it. Will I want more fun paper things? Yes. But for now, I'll look at what I have and what I can make while I'm on my no-spend.

EAT SOMETHING GOOD TODAY?
Zuchinni noodles saute
Crockpot Swiss Steak Stew
Bet you weren't expecting that question having anything to do with a no-spend. Maybe your no-spend has to center around eating out and the huge amount of money that costs. That's why it's good to keep your pantry stocked, and much cheaper, and yet feed yourself well. You'll feel good and be more creative about how you spend your time, and not your money. Also, do things, like utilize your crockpot and let it have dinner ready for you!

Click here for my Crockpot Swiss Steak Stew

YES CAN MEAN NO?
A local vintage shop I LOVE
You can say "yes" to shopping and "no" to buying. Here's the secret. Think of it as research. While you're shopping, and you see things you really want, or maybe want to purchase at some point as a gift, make a list and write down what the item is, where you saw it, and the price. Maybe the next time you go back, the price will change and it will be on sale! Another idea, keep your phone in your hand while you shop, and take a photo of a display that you are loving. Sometimes the whole reason we impulse buy is because of the way something is displayed and how gorgeous it looks. Then, you get it home later, and you're not really that thrilled with it. Take a photo though, and you can enjoy looking at that pretty anytime you want.

Also...go shopping places to just get out and enjoy the atmosphere!
A local shop that has a lot of aquariums.
Outdoor festivals don't need to cost a lot!
And a bonus tip: take very limited funds with you! Don't carry a bag full of credit cards and cash. Then you can't spend!

"Be moderate in order to taste the joys of life in abudance."
Epicurus

Eat, Write, Dream, Stitch

Thursday, July 7, 2016

Making Fun Paperclips from Your Stash

Flagging your most often used sections of your Midori traveler's notebook is easier with decorative paperclips. And let's face it--you can use fun paperclips as bookmarks anywhere in any book, planner, or journal. You probably have everything you need in your stash to make some for you and your friends.
If you have a zillion of the colorful paperclips, you can make them decorative with anything that's somewhat flat. See the cute glittery dress in the center? That came from an old toy stash I had found from my daughter's toys of the past--it was a pretend cookie from her American Girl doll stuff!
I use cute buttons, big sequins, silk flowers, and I've made paperclip flags with glitter washi tape too.
Hot glue your decoration at the top of the paperclip, opposite of the clipping end. After it has cooled, add a little piece of washi tape on top of where you glued on the back to secure it and to cover up the glob of glue. Another way to make it cute on both sides is, for example, glue a silk flower on one side and a button on the other side which then looks like the center of the flower. You can also use a piece of jewelry if it's somewhat flat--I could fix a cuppa tea and make these all day!
Put a scrap piece of paper under your glue gun to catch the drips of glue.
It's also a great idea to keep a few extra clips in your planner along with extra stickers and post-it notes to use on the go. Be creative, have fun!
Eat, Write, Dream, Stitch

Tuesday, July 5, 2016

A Second Life for Your Outdated Planner - A Forever Art Journal

Well it's that time of year when you may be splurging on a new planner! I have to tell you, I've been a planner girl since the only planners out there were boring ones! I made my own from those cute cloth-covered journals back in the day...that's how desperate I was for planner peace before I ever heard that term. Now, you can find beautiful, colorful, fun planners in all colors, shapes, sizes, and prices! I think it is a little hard to spend on the luxury priced planners since they will be outdated next year. And what if you get tired of it before that? What if you didn't find "planner peace" and you spent eighty bucks on an Erin Condren?

So think about it before you rush out and buy the latest planner trend. Think about its function in your life, if you'll really use it, and what you will do with it later? Toss it? Keep it for decades? Do you have the space? It is worth shopping around and thinking about it long term.

I often use an Orange Circle Studio planner, and the one I was carrying in my bag for a few years in a row was small, but the pages were art journal themed. I thought it was gorgeous, and it cost just twelve dollars for the weekly page layout and it was filled with places to write and journal things. So when its time was up, I couldn't bear to toss it. After a couple of years, I took two of these journals and upcycled them into a forever art journal. I stitched and glued some of the unused pages together, added beads, ribbon, and now after having this homemade journal for a while, I realize how much I love it. I keep my favorite bible verses in it, thoughts, and ideas. It's like an inspiration book. But I like to call it, a forever art journal.

See how I upcycled my planners here

So I wanted to remind you, that your planner can have a second life, a restaging, a do-over. Just pick the right one in the first place, and you could enjoy it for longer than it was meant to be. When its time is up, you could rip it apart, take the best of it, and stitch together your own forever art journal. Get out the glue, floss, glitter, buttons, ribbon...whatever you like, and have a great time knowing you spent your planner money well.

In the meantime, Orange Circle has come out with a new version of their gorgeous planners on Amazon, and I've got one preordered that starts in August for around eleven bucks I think it was to preorder. I have no idea what the inside actually looks like, but I have faith because I love their designs. This is going to be my office planner, and after that, well, you know what!


Eat, Write, Dream, Stitch

Monday, June 27, 2016

Upcycling An Old Leather Bag Into An Everyday Midori Travelers Notebook

 I don't know if I have to tell you how a Midori Traveler's notebook can be your best friend, personal assistant, organizer, art journal and planner...but you may already know! I love making my own Midori style notebooks from the covers to the inside booklets themselves. And even if I order a booklet for my Midori, like I did recently from Yellow Paper House on Etsy, I will also decorate it with my scrapbooking supplies and make it one of a kind.
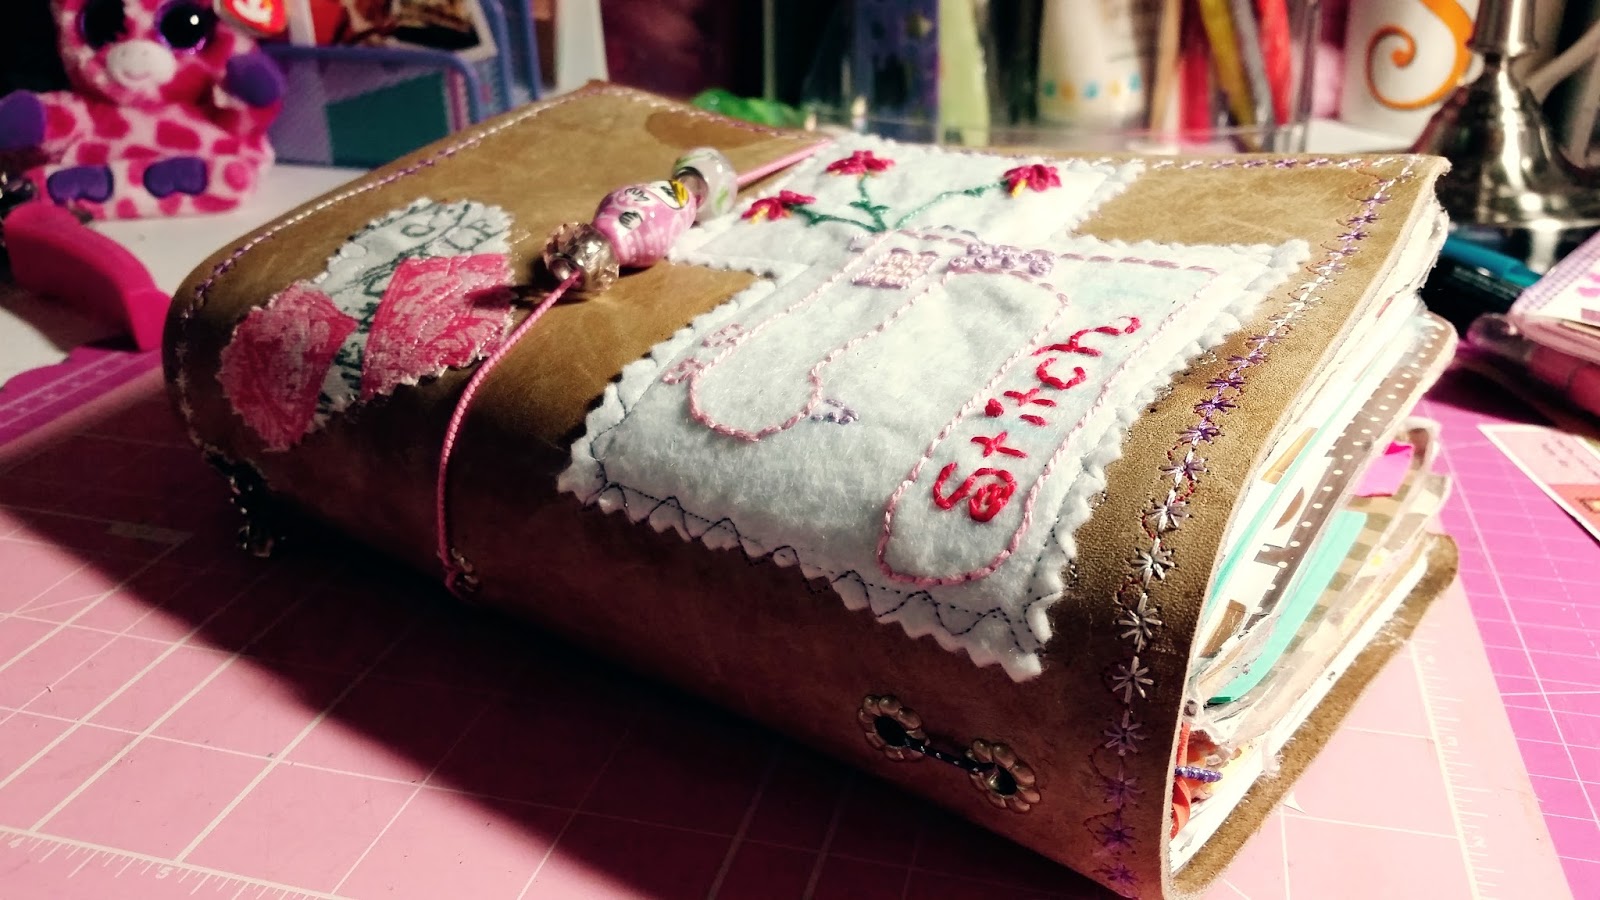
So this past weekend, I was in the mood to make a real leather Midori style notebook, and I knew my leather source would be a 30-year-old Coach bag that I had never let go of. (I'm all about upcycling) When I graduated from college and got my first job, I really wanted a nice bag, and Coach was the thing in the 1980's. So I have never let go of my first Coach bags, and my big brown one was well-loved, let me tell you. WELL loved! I was running from the beach in a rainstorm one day when I got a huge watermark on my bag, and it never went away. That whole side of the bag looked especially loved with more than one watermark and wear on the leather, so that's the side I cut first to make the Midori. It measured 9X12. Perfect for cahier size. My next question was, what to do with the love, the watermarks, and the imprints where the bag handles had been. I would have loved it to be just a perfect piece of leather...cut it...put in the grommets and done! I certainly could have just left it with all the love and imperfections--nothing wrong with that! But the more I thought about it, the more I actually wanted to applique where the handle had been and add decorative stitches. But could I sew on this leather? And sew, I did.
Well loved leather bag reborn into a newly loved Midori
First I cut out the whole side. Then I took a seam ripper and took off the handle. I took my ruler and rotary cutter to straighten up all the sides and then I put the approximately 9X12 piece of leather in my sewing machine and put a decorative stitch all around the edge, first with some red embroidery thread, and then with a purple variegated thread. I loved it.

I looked around in my stash for what to applique. I'm always embroidering on pieces of felt, and I'm always cross-stitching something. So I found an embroidery to applique to the front cover, and some fabric to make into a heart, to cover a little cut in the leather on the front cover, and then a matryoshka cross-stitch for the back cover. Of course, I have to have a matryoshka doll on there somewhere!

After I had all the stitching done, it was time to add the grommets--one goes in the center back spine, two at the top spine, and two at the bottom spine. This is because I like to have two pieces of elastic on the inside so that I can add a total of six booklets. With such a piece of roughed-up well-loved Coach leather, it was fun to add these decorations, and it made me want some pink sparkly elastic for the closure with some cute beads added.

Appliques all stitched.
I use a piece of 18-inch elastic and thread it in double and tie a knot.
You can see on the inside cover where the handle had been!
I have to say, making a fabric Midori does take a bit longer than this leather one. There is much more cutting and stitching involved, and there is a liner, more ironing, and I add pockets and pen loops with fabric Midori's. With this one, I will just add a binder clip to keep a multi pen on there. I made a six-pocket folder for the inside with a dashboard, so no pockets needed on the inside cover. (more about the insides in another post!)
A c-s matryoshka appliqued on the back cover--there's an old stain I left exposed.
Remains of the day--the bag, now cut up--there's another good piece of leather!
Honestly, if the hardware on this  bag had held up, I don't think I would have upcycled it like this. But it was just rusty and gross, and now I'll basically be using this bag in its new life every day!
I add a charm to the back too.


Although I covered up where the bag handles had been, because I thought it looked odd, I don't mind having all the imperfections in the leather showing. To have a big ole water stain reminding me of running from the beach in a rainstorm when I was young, not bad! Midori's are all about memories and planning for the day and the future. Mine is very personal.

See other Midori posts here:

Making a "baby-dori" from Coach leather
Making and decorating Midori booklets
Stitching a fabric Midori and decorating booklets for it
Planner peace in your Midori

Eat, Write, Dream, Stitch


Monday, October 12, 2015

Magical Monday Organizing - Stash Dash 2015

Coffee + Planning = Magic
Isn't organizing a magical thing?
I hope so, since I spent my extra time this weekend trying to get scraps of paper, this and that off my desk and into a place where I could find what I need when I need it.
After you're all done it does indeed feel like you waved your magical organizing wand. Ahhh.

The thing which started all this was very simple: one of those accordian files from the Target dollar spot. Yes, it cost one dollar!

I didn't know what I was going to use it for, and then I realized. It's the perfect size for the little pieces! Stickers, scraps, die cuts, etc. These are the things I use all the time for my planner, scrapbooking, art journaling, tags and cards.

When I cut up a pretty piece of patterned paper, I like to use it all. What has been happening is, those little scraps I'm not using right away get piled up into a tray. Lately, that tray has been out of control! Enter the dollar accordian file.
 Once I started sorting my scraps and bits and bobs, it was very clear what my categories should be. The little file came with a label sheet for the tabs. I decided that my labels did not need to be in alphabetical order -- I'm such a rule-breaker! Instead I put them more in the order of how I would use them. I put the kiss-cut store-bought stickers under the general tab of "stickers" and my planner stickers, which I usually download from somewhere and print on a shipping label sheet, under the tab "planner stickers." Then I had some cardstock scraps which were nicely trimmed, some were die cut, and others were clearly just scraps and they were sorted accordingly. Here's how it ended up looking.
 I plan to die cut lots of flowers and hearts soon, so I made a section for those. Nice, eh?
Kiss-cut Stickers, Planner Stickers, Scraps and Diecuts all organized!
I packed this organizer full to the brim, and yet it still closes up very nicely! It fits right into one of my cubby shelves, so it is at the reach for any project. It would also travel well. Mission accomplished.

So here we are in October, and every month I've made an effort towards the 2015 Stash Dash I started way back in January, tips and all. You can see it here: 2015 Stash Dash

 I've upcycled, recycled, repurposed, and tried to make the most of what I have. This year I've probably done the least craft shopping ever. Once I get my latest project, my beautiful stitched Midori Traveler's Notebooks finished and selling, you can be sure I'll be doing a Michaels-Hobby Lobby-JoAnn run (they are all within a couple of miles of my house, I literally could run!). But I think this time, I'll be a smarter craft shopper--buying what I'll need and use, and not what will collect dust in my stash.

Eat, Write, Dream, Stitch


Thursday, July 30, 2015

Matryoshka Bobbins--Make Your Own Custom Paper Bobbins


I'm a little mad about Matryoshka dolls. I love how they are painted. I love that they nest and there can be so many of them all packaged up. They just make me happy. I collect the nesting dolls, I recently cross-stitched some, and I'm stitching projects right now from the cutest fabric Matryoshka print. I have a Matryoshka coin purse, tote bag and matching notebook I've turned into a TV recipe book, and today I made a few paper bobbins.

Super easy. I found this Matryoshka printable (check Etsy and Pinterest for your favorite paper bobbin designs), printed them on Avery shipping label sticker paper which can go right through the printer to make stickers, and stuck a sheet of six onto a folder I was upcycling. I fussy-cut those out, then cut out the other sticker sheet of six to put each one on the back, and wallah. Matryoshka paper bobbins! Perfect for those extra skeins of floss or pearl cotton.
 Eat, Write, Dream, Stitch


Thursday, July 2, 2015

DIY Cell Phone Holder - Busting Your Scrappy Stash

 Here's another quick idea to help you enjoy your pretty paper stash...
Make a cell phone holder! It's very easy--but you need to find a plastic case to upcycle. I made this one from an old acrylic computer disk case, believe it or not, but you can actually use an acrylic cassette tape case and achieve the same results. A cassette tape case will probably still have the J-card inside, and you can use that for your template.
Found this when I cleaned out a closet at my office!
I didn't have the J-card in this to use a template, so I just eyeballed it, trimmed out my scrapbook paper to fit inside, after the case is standing open, and then I trimmed a little square piece for the inside bottom to coordinate and used both adhesive and some washi tape.
I love being able to both stare at some of my pretty papers, and have a stand to keep my phone on my desk! Also, it always feels good to upcycle.

Eat, Write, Dream, Stitch, Upcycle


Thursday, June 25, 2015

DIY Life Planner Part Two--Making It All About You

If you missed part one of making your own homemade life planner with your pretty stash of scrapbook papers--scroll back down to the June 23rd post. Find the supply list and how to get started.
Now that you've created your weekly and monthly pages, what else will make this life planner all about you?

Think of the things you love and what you want to do every day.


I want to write, stitch, cook, garden, and get some things published! I think my life planner can help me do all that with the following.


  • To do lists for every week
  • Pocket folders that provide a place for printouts and clippings, an in-box/out-box, and mail
  • A post-it note dashboard in the front where the grocery lists live until I go shopping--this gives me a place to note if I have a coupon for that item and I can even pull it and put it with the list
  • Long-term lists including my master make list, writing projects in the works, and new ideas
  • A weekly menu planner
  • A little printed-out section of my favorite recipes in the back
  • A quote section--I collect quotes
  • A few sheets all about home organizing and projects for my house


Now you know why my life planner is so big! And also, this is why I needed ultra customization you can't buy.

I put my go-to recipes in the back of the planner with this mason jar patterned paper in front of that section. The magnet clip also marking my recipe section is a DIY from scattered squirrel. It was super easy to print  this out--there are also magnet clips for the months--and trim it, score it and fold, and then for the magnets on the inside, just cut up some of those squares of promotional magnets that you get everywhere for free. I actually used some old magnet calendars from my auto repair center! At this point, I'm feeling like an upcycling queen.

I love these organizing boxes from the dollar spot at Target, and one is now dedicated to my planner accessories that include my homemade ribbon paper clips, post-it tags, and those DIY magnet clips.
I used washi tape all throughout my planner making--it's super cute and it's repositionable.
Obviously, I love mason jar art. I'm a canner, and mason jars remind me of childhood with my mom and grandma being great at canning. In the middle of my life planner making, I found these half-price--it was a must have. I also created a planner for my daughter, and her likes and loves, and I actually had her planner spiral bound for just a few dollars and picked up some planner stickers as I created a whole kit for her planner. She loved it even more than I thought she would.
Pretty velum paper on the left, and a patterned paper to make a list on the right.
Speaking of binding, for my giant life planner, I used a three hole punch for all the pages, and then ended up just binding at the top and bottom with the clip rings. It actually works great for me and I can easily add and remove things.
 This is the most unique page in my planner. It is just there for decoration and for me. It is two vintage embroidery pattern packages sewn together. They belonged to my mother, remind me of her, and remind me how precious handmade things really are. I love looking at it. This is what your planner is all about--what you love, what motivates you, and what you want to look at every day.
sewing this vintage packaging

Maybe the best idea I ever had was this weekly menu planner to go in the big planner. I just created it myself in Word, and this way, I can go back and see what we had in the past weeks to motivate myself to actually use my recipes and have fun with food again.

It also helps me create the grocery shopping list, and magically, who knew, when you have the right ingredients, you can follow the recipe!

I have been getting my crockpot out a lot, I have to say. It's because of my planner. Slow cooking in the summer is just the best. You don't heat the kitchen, you can do other things and then, wallah, dinner's ready.


I have a lot of patterned paper pads that have pages with these fun boxes, meant to be trimmed out and used in your scrapbooking and journaling. They provide some great little places throughout my planner to just jot down and journal about something that happened, or something I just don't want to forget. So cute to have them in here, and so me.

You might be amazed at how a homemade life planner can make life better! Don't depend on a company to know what you need. Store bought planners are so generic. But there are a few planner makers who are in the business of customization. You can go that way--which is a little pricey, but worth it if you don't mind paying seventy or eighty dollars for a planner--or you can have fun concepting and creating your own customized life planner with your stash and things to upcycle. Make it the size you want. Mine, as I said before, does not travel, so it's big and has it all. Make it the look you want. Find some sturdy covers to upcycle and tailor them for your new book. Make all the lists and pages that apply to everything you need every day.

This was a super fun project, and I'm so happy with the results, and it also resulted with my making a special planner for my daughter.

Making a life planner is all about you--be selfish with those pretty papers for a change, and enjoy it!

See you next Tuesday with a new scrappy stash busting idea.

Eat, Write, Dream, Stitch, Plan