Saturday, October 30, 2010

Bag of Dreams


I finally finished my rustic little embroidered bag that began at a tag sale. Two soft white little embroidered blouses, 25-cents each, started this whole thing. They featured white on white embroidery, eyelet cutouts, and colorful stitching--I knew they had to be repurposed for something. I snipped out the pretty embroidered sections for my zipper bag, and used the backs of the little blouses to stitch together its rustic handle.


I embroidered the words "Bag of Dreams" onto one side of the bag, in pink DMC and stitched x's in a varigated purple DMC down the handle.


The other side of the bag has two swatches of fabric sewn in and more eyelet, along with a little cross-stitch heart patched on. A light teal linen serves as the lining.


A little fabric bag with layers and layers of color and embroidery, stitched together for a cotton country look--makes me want to find more embroidered blouses at more tag sales!


The blue zipper has a beaded pull added on as well. I think this will be a fun bag to hold some stitching and knitting projects on the go!


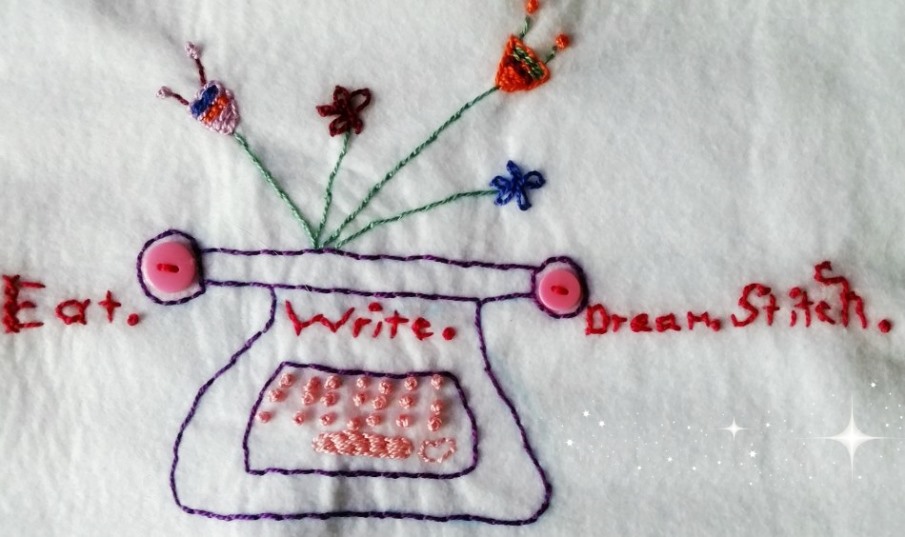
 This makes me both kinda sad and kinda happy--the last basil bouquet from the garden...the next day we had our first frost! That's okay. There's much more to eat, write, dream and stitch.


Wednesday, October 27, 2010

WOYWW #2

What's On Your Workdesk Wednesdays really lets you show off your creative trail! My path of construction starts at my sewing table this week. I'm finally putting together my embroidered zipper bag (called "bag of dreams") and have finished the c-s on the body of a cute cutie cute doll.

I guess I'm officially hooked on WOYWW! I love all the comments I received last time and have really enjoyed visiting the other blogs and making new creative pals!

So, I have to do a closeup of my new organizing tray -- on clearance at Target! It's helping to calm the desktop clutter. My big workdesk is rather homemade. The actual big ole wooden desk was won at a silent auction for $4 years ago. My wonderful hubby painted it, and he found the mailbox shelves, painted them and added the molding trim which he also painted. It's a great retreat for someone who writes, stitches and scrapbooks.

I have too many lamps--I need one nice powerful desk lamp! To the left, though, is a French door which opens onto my long sunroom and brings in plenty of sunshine on the best days. But this is what my desk looks like today.

I hope you have a wonderful, creative week. I can't wait to see your place!

Eat, write, dream, and stitch your cares away!


Thursday, October 21, 2010

Knitting in Sequins

All a messy bun needs is to be surrounded by a few sequins, right? So, my lovely daughter was checking out my yarn stash--she has quite a yarn stash herself, she could open a yarn store I think. However, our favorite yarn store is Simply Fibers and maybe I can give you tour sometime, but in the meantime, we ran across a bit of pink sequin ribbon yarn purchased there a while back. Immediately, I saw a sequin hair scrunchy coming together! I knitted it up in no time--making it about 10 stitches wide, sewing a seam with more pink yarn, and inserting a piece of elastic. Boom--ready to go in my messy bun! Those sequins really hang onto your hair too!  I think it's funny I took the photo above and captured a note on my calendar--"chili buffet at our house" on Halloween. It's a family tradition to have the Halloween chili buffet and use the first of our canned garden tomatoes--more fun to come!

Eat good food, write down your favorite quote, dream your dreams, and stitch everything.


Wednesday, October 20, 2010

My First WOYWW

It's What's on Your Workdesk Wednesday!! So here we go--from a blog called The Stamping Ground, I've discovered What's On Your Workdesk Wednesdays (WOYWW). I love seeing other peoples' creative spaces and I'm adding to the Wednesday fun with exactly what was on my workdesk this morning. There are many creative bloggers out there who do this--I love it!

It's not nearly as neat and clean as I wish--I would have cleaned up if I knew company was coming! However, I decided to do this WOYWW during my morning mug of coffee (see Tinkerbell mug next to laptop). Even when I have a lot of projects going on, I love my creative space--it makes me happy, and like Cinderella in her own little corner in her own little chair, it's a refuge from the world. Let's see if I can give you a closer look without the camera flash - it was still dark this morning when I was up and around, fresh off the treadmill and drinking coffee! My pedometer is laying there. Okay, still not a good view - I'll have to work on that. I have some yarn laying around, and inside a little box on top of my desk is several squares of Aida cloth and some DMC floss--I am making a doll! I hope she will be cute, and her body will feature some sweet little embroidery. On the little work table to the left are the knit squares and my big cross-stitch bag layed out. My patch happy knit wall hanging is going to be coming together this weekend, and there is a cross-stitch quilt in the works too. In the meantime, I have not forgotten my mixed media fabric themed houses. The one in production right now is called The Love Shack and it is full of heart--in the desk drawer. I hope it's finished by Valentines. But first, the wall hanging and then my little cross-stitch doll. If she turns out cute, I think she'll have some friends. I wish I had more hands, or more me's!


Eat, write, dream and stitch your heart out.


Tuesday, October 19, 2010

Roasted Garlic - Sweet!

Roasted garlic and some toasty French bread slices can make the meal, or be the meal. I tasted my first sweet, creamy delicious roasted garlic during a trip to Chicago years and years ago, at an amazing restaurant on Michigan Avenue. Ever since then, it's one of my favorite things, especially this time of year, and it's incredibly easy.

Make at least a head of roasted garlic per two people--although I've seen people use a whole head of roasted garlic! Simply cut the top off of each head of garlic, and place in a muffin tin (I used to think I had to have a fancy garlic roaster, but no, a muffin tin does the trick). Drizzle the tops well with olive oil, and cover each with foil. Bake at 400 degrees for around 30 to 35 minutes, or until cloves are soft and ready to squeeze--so yummy and surprisingly sweet. Still with an abundance of onion and garlic chives from the garden, I chopped garlic chives to sprinkle on the bread slices...so perfect with the roasted garlic.


Eat well, write often, dream daily, stitch everything.


Monday, October 18, 2010

Dreaming Up Candle Jar Jewelry


Who can resist a bead sale - even if you don't make jewelry? My daughter and I were shopping for yarn at Hobby Lobby, and all the beads were half off. Looking at dozens and dozens of beautiful sparkling beads made me dream about fabulous mixed-media projects, and I stocked up on plenty of pretty glass beads. Next, I went to a local garden greenhouse and gift shop. This place has the kind of gift shop that you can get lost in all afternoon, and that's where I noticed they sold candle jar jewelry--their jar jewelry was Halloween themed and really cute. I loved it. After purchasing a few other items, like the cutest little birdies in their nests, I went right home and started stringing beads! I had to make my own candle jar jewelry! Even though I had seen gorgeous Halloween decorating, I was not in that kind of decorating mood. I was feeling very beachy! I made plenty of ice tea, and let the beading begin.
I think stringing beads is probably one of the most relaxing things you can do; I used to sit and string beads with my daughter all the time and we were always stocked up on beads.

By making my own jar jewelry, I could try it on and make it just the right size. I think you definitely want to use glass beads though - not plastic which could get too heated. (Follow all safety precautions when using jar candles.) Although I can't let go of summer, I have decided that for my Christmas open house I'm going with cinnamon jar candles and Christmas-themed jar jewelry!

We had a gorgeous weekend of weather here in the Ozarks, and I threw open all the doors onto my greenhouse sunroom, soaked up the sun and had a lovely afternoon decorating my candle jars! I was having so much fun with my new glass beads, I even made a hippie ankle bracelet, kinda wishing I was near a beach where I could walk barefoot in the sand. Obviously, it doesn't take much to get me in the summer mood again and longing for the ocean!

 "The cure for anything is salt water; sweat, tears or the sea."
--Isak Dinesen


Thursday, October 14, 2010

Pear Tart to Finish


This elegant, easy-to-make pear tart was a perfect fall dessert--so we finished it for breakfast!

The whole tart-making frenzy began with a pan, and some cans. I don't know how long I've had this cute, really nice tart pan, but it was still new. Never used it! Rearranging some cabinet space, I noticed it again, and it was calling out to me. Make a tart with me lady! Then, my mother arrived with all of these cans of fruit she couldn't eat. Among them were several cans of pear halves. I decided to plan a nice almond pear tart which would be low in sugar--especially since I knew I'd be using butter! Here's the recipe. The other shortcut was Pillsbury ready-made pie dough. But I think next time, I'll make my own rustic pie dough.

Almond Pear Tart to Finish
1 prepared ready-to-bake pie dough round
1/2 cup blanched almonds
1 tablespoon all-purpose flour
5 tablespoons Splenda
2 tablespoons granulated sugar
3/4 stick butter
1 egg
2 cans pear halves
whipped cream (optional)

 First, make the almond filling by processing the almonds with the flour and adding the Splenda, sugar, butter and egg until it's nice and creamy. Transfer it to a bowl, cover, and refrigerate at least three hours or for up to two days.


Using the prepared pie dough, line the tart pan with it, fold and flute the edges, make a few fork piercings on the bottom, and bake it off at 425 degrees for about 8 to 10 minutes. Then reduce the oven temp to 350 degrees.

 
Spread the cold almond filling evenly in the crust--but do this gently and be careful not to tear the crust. In this step, I tended to gently mash it down and around rather than so much spreading around. It doesn't have to be perfect. Then slice the pears into thin fan slices and use a long spatula to transfer them and arrange on top of the filling, almost like the spokes of a wheel. The narrow end of the pear half goes toward the center. Bake for around 45 to 50 minutes at 350 degrees. If the edges of your tart are starting to bake past a nice golden brown color, then cover the tart loosely with foil as it continues to bake. (Don't burn yourself--see my blog about aloe vera!). Cool the tart in the pan, then push the pan bottom up (I use a large can) and release the tart. This tart can stand at room temperature for several hours, but you'll need to eventually refrigerate it. Cut nice wedges and top with whipped cream. So yummy!


Okay, back to stitching. Eat well today!


Wednesday, October 13, 2010

The It's-A-Good-Thing One-Hour Tank

Once upon a time, I had a couple of cute, supersoft t-shirt tank tops. They grew old and frail, and eventually I had to toss them. It was sad. But before I got rid of the last one, I used it to cut a pattern and from there I made several tank tops that summer. This past summer, I decided to make things a little more fun. After I argued with myself about whether to pitch some old beat-up t-shirts I was kind of attached to, I cut them up and made the It's-A-Good-Thing tank top. I don't think Martha would be proud, because it's rather slouchy and rambly and not perfect like Martha's stuff--but it is very comfortable with some old denim shorts or thrown over a swimsuit. I like it, and please don't turn me in to Stacy and Clinton.

But back to those shirts--who would hesitate to throw out these stained shirts, right? However, they were high thread-count supersoft shirts, and with my penchant for sewing things onto things, I made a rescue and made my applique tee.

 This Little Project Only Took An Hour
The backs of the t-shirts were in great condition to be usable fabric, and I simply cut out the embroideries from the front, added some kitty patches from a cute piece of material, and at the bottom on the back I appliqued a "goodbye heart." I am one happy appliquer (is that a word?)--whether I'm sewing by hand or with a machine, I love to sew things onto things! Hey, I need a t-shirt that says that!


It's always good to Eat, Write, Dream and Stitch.


Monday, October 11, 2010

Eat a rainbow today and feel good

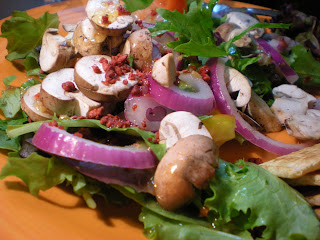
Lately I can't get enough baby portobello mushrooms and spring salad mix. Don't forget the bacos! Although the "red" in my food rainbow in the salad comes from fresh tomato, still trickling out of the garden, and my purple is courtesy of "red" onion slices. If I threw in a few blueberries, I'd have it made. My favorite salad topper is a few parmesan crisps--made by making little piles of freshly grated parmesan in a nonstick skillet and cooking gently until crisp.

"I always laid vegetables out in a circle, each with its own section like a slice of pie. There were five slices: red cabbage, onions, leeks, carrots and turnips. I had used a knife edge to shape each slice, and placed a carrot disk in the center."
--Girl with a Pearl Earring, by Tracy Chevalier


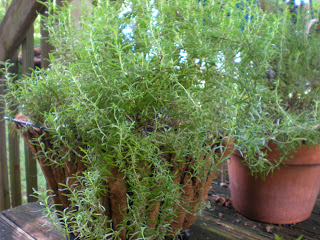
"As for rosemary, I let it run all over my garden walls, not only because my bees love it, but because it is the herb sacred to remembrance and to friendship, whence a sprig of it hath a dumb language."
--Sir Thomas More


Sunday, October 10, 2010

A little visit to the Craft In America Exhibition

Seeing this amazing piece at the Craft In America exhibition today, made my day. The incredible design of masks--reflected on the table--is sandblasted into the blown glass. I was in awe. Apparently this is a series on PBS, in several installments, so I definitely plan to see the whole thing. The other ultra-amazing item in the exhibit was the Conold Bench, pictured below.
There were more than 50 works of art, and with my love of sewing and mixed-media fabric, I searched for something in this genre. That's when I found the under-the-sea mixed media fabric quilt, and I was happy. It is filled with gorgeous fabric, beads, buttons, sequins, you name it--of course the photo doesn't do it justice. I just had the urge to go home and start stitching something! Then I saw a series of works crafted by Native Americans--stunning items which included these beaded high-heeled hightops. It was a great day! After all of this crafty eye candy filled with beads and sequins, I know what my next new project will be. Exhibits like this truly feed you with the inspiration you need. 

In the meantime, here is one of my original cross-stitch designs I have finished. I created it right on the Aida canvas, so now I need to actually chart it. It's called, The Back Porch.

Eat, write, dream, stitch and stay inspired!


Thursday, October 7, 2010

The Cook's Plant

Everyone who goes near a stove should have an aloe vera plant. I've had the same huge aloe vera plant for about five years. Many little cook's burns later, I realize I can't do without that plant! If I burn myself on the oven and immediately break open an aloe stem and apply the pure gel that's inside, my burn never hurts and begins healing immediately. My plant has also saved me from the iron and sunburned shoulders too!

An aloe vera plant likes to dry out completely inbetween waterings. The mother plant, when she's happy, tends to have little "pups" and if there are a lot of pups, you can eventually put them into their own pot and share your plants with other cooks. Even in the summer, I just leave my aloe plant on the sunporch and it is perfectly happy. Last year I overwintered it a little too close to an impatient, and the impatient potted its babies right into my aloe plant! So I've got some repotting to do!

Fall is really settling into the Ozarks right now, and we have some beautiful days with 50-degree mornings and 80-degree afternoons. I love how my outdoor potted plants look right now, all full of blooms. But soon I'll have to start the process of deciding which ones to overwinter on the greenhouse sunporch. I love the ones that keep blooming for a long time--it makes the sunporch my favorite place to have morning coffee in the middle of winter!

The tomatoes are dwindling out, but I still have some hearty flowers in the cutting garden--so maybe a few more bouquets? 

Overall, there is not as much gardening to do, so I'm back to more sewing, concepting and writing Christmas scripts my publisher requested (yay!), writing a devotional book, and getting ready to do another 5k with my hubby. I'm not ready for winter, but, as a summer girl, I'm doing my best to embrace fall.


Eat well and cook safely!