Showing posts with label planner. Show all posts

Thursday, July 21, 2016

Orange Circle Studio 2017 Do It All Planner - Flip-Thru

 Very excited to get this in the mail! I had preordered the Secret Garden version of Orange Circle Studio's new 17-month weekly planner from Amazon for around $10. I can't seem to find their planners around my town any longer, so I was happy to preorder this very inexpensive planner. And I will tell you why...as we flip through...it will be perfect to use in my office this year.
Who doesn't love planner stickers and this planner has 300 of them. They are so handy, right in the front.
I may or may not have my Midori planner with me each weekday, so I can coordinate my office and home schedules in this planner, yet keep it at the office.
It has the yearly and monthly calendars.
Each monthly calendar has a lined space at the bottom to write notes.
It gives you a weekly vertical view. This is perfect for me, because I don't have an hourly type of schedule each day. But if I do have a meeting, it's easy to pen it in here with my daily to do lists. Each week has an inspirational quote too.
It also folds in half very nicely.
 In the back of the planner is a generous of amount of shopping and to do lists! They are perforated, so when I list things, I can tear them out and take them with me or stick them in my Midori planner which travels with me.

They give you lots of shopping and to do list sheets that can tear out.
Inside the back cover are some card holders--perfect to keep several business cards I need to reference.
And, of course, being a paper lover and planner girl I love both the pocket on the front cover, and how the label is designed to peel off so that you can decorate the front cover the way you want! Of course, this would be a perfect life planner for home too. Hope you enjoyed this little flip-thru. I just can't bear to use a boring planner, even at the office, so this one has everything I need since I work on the academic year in my office planners. Hope this helps you find your perfect planner without spending a ton!

Eat, Write, Dream, Stitch


Wednesday, July 20, 2016

WOYWW 371--Play and Planner Mail and Another Cat Photo

Oh how I love happy mail. In the mail today, and now on my desk, was my July Sephora Playbox, and a brand spanking new planner.
Coffee...beading...play mail
AND...drumroll...Julia's hosting again!!! So excited to have our Julia and yet we still have our Jan who was the best BFF in the world to host this group of fine crafters!
Visit our desk and mess here at What's-On-Your-Workdesk-Wednesday.
making sparkly bracelets
It's the only place in the world where a desk is so much more than a piece of furniture.
I do love a little makeup--oh yes--and subscribing to the Sephora Playbox (10 bucks a month) lets me dabble in some luxury brands I am too frugal to buy, but I can still enjoy them and find out if I even like them or possibly can't live without them! It always comes with a fragrance sample, and I'm really enjoying that too--I've loved every fragrance so far. The deluxe-size samples are quite generous and it comes with a card that will automatically give you 50 bonus points in the store no matter what you buy. It may take a month to be on the waiting list to subscribe, but I really like it.
Here's a little unboxing moment:
The planner mail is a new planner by Orange Circle Studio that I had preordered on Amazon. It's a 2017 16-month planner that starts in August--it includes planner stickers and tear-out to-do sheets and shopping lists. Ten is my number, because the preorder price was 10 bucks! I've seen this planner priced as high as 14.99 and also someone mentioned they got it at a Home Goods store for 7.99--but it is not available at any store I have in my city. So I'm pretty happy with this.
I'll do a flip-through on the blog later.
I got my mail opened, drank my coffee, put on my makeup for the day, and then started cleaning off my desk for more beading. Then this happened.
That's my daughter's calico cat, Sweetie. And when darling daughter is busy and not at home at all, Sweetie sets up shop in my crafty corner with me. She is actually completely precious, but really...do we have to clean our white bums on my nice white craft desk? *sigh*

Have a lovely week, and Julia, you and Jan both rock!

Eat, Write, Dream, Stitch


Thursday, July 7, 2016

Making Fun Paperclips from Your Stash

Flagging your most often used sections of your Midori traveler's notebook is easier with decorative paperclips. And let's face it--you can use fun paperclips as bookmarks anywhere in any book, planner, or journal. You probably have everything you need in your stash to make some for you and your friends.
If you have a zillion of the colorful paperclips, you can make them decorative with anything that's somewhat flat. See the cute glittery dress in the center? That came from an old toy stash I had found from my daughter's toys of the past--it was a pretend cookie from her American Girl doll stuff!
I use cute buttons, big sequins, silk flowers, and I've made paperclip flags with glitter washi tape too.
Hot glue your decoration at the top of the paperclip, opposite of the clipping end. After it has cooled, add a little piece of washi tape on top of where you glued on the back to secure it and to cover up the glob of glue. Another way to make it cute on both sides is, for example, glue a silk flower on one side and a button on the other side which then looks like the center of the flower. You can also use a piece of jewelry if it's somewhat flat--I could fix a cuppa tea and make these all day!
Put a scrap piece of paper under your glue gun to catch the drips of glue.
It's also a great idea to keep a few extra clips in your planner along with extra stickers and post-it notes to use on the go. Be creative, have fun!
Eat, Write, Dream, Stitch

Monday, June 27, 2016

Upcycling An Old Leather Bag Into An Everyday Midori Travelers Notebook

 I don't know if I have to tell you how a Midori Traveler's notebook can be your best friend, personal assistant, organizer, art journal and planner...but you may already know! I love making my own Midori style notebooks from the covers to the inside booklets themselves. And even if I order a booklet for my Midori, like I did recently from Yellow Paper House on Etsy, I will also decorate it with my scrapbooking supplies and make it one of a kind.
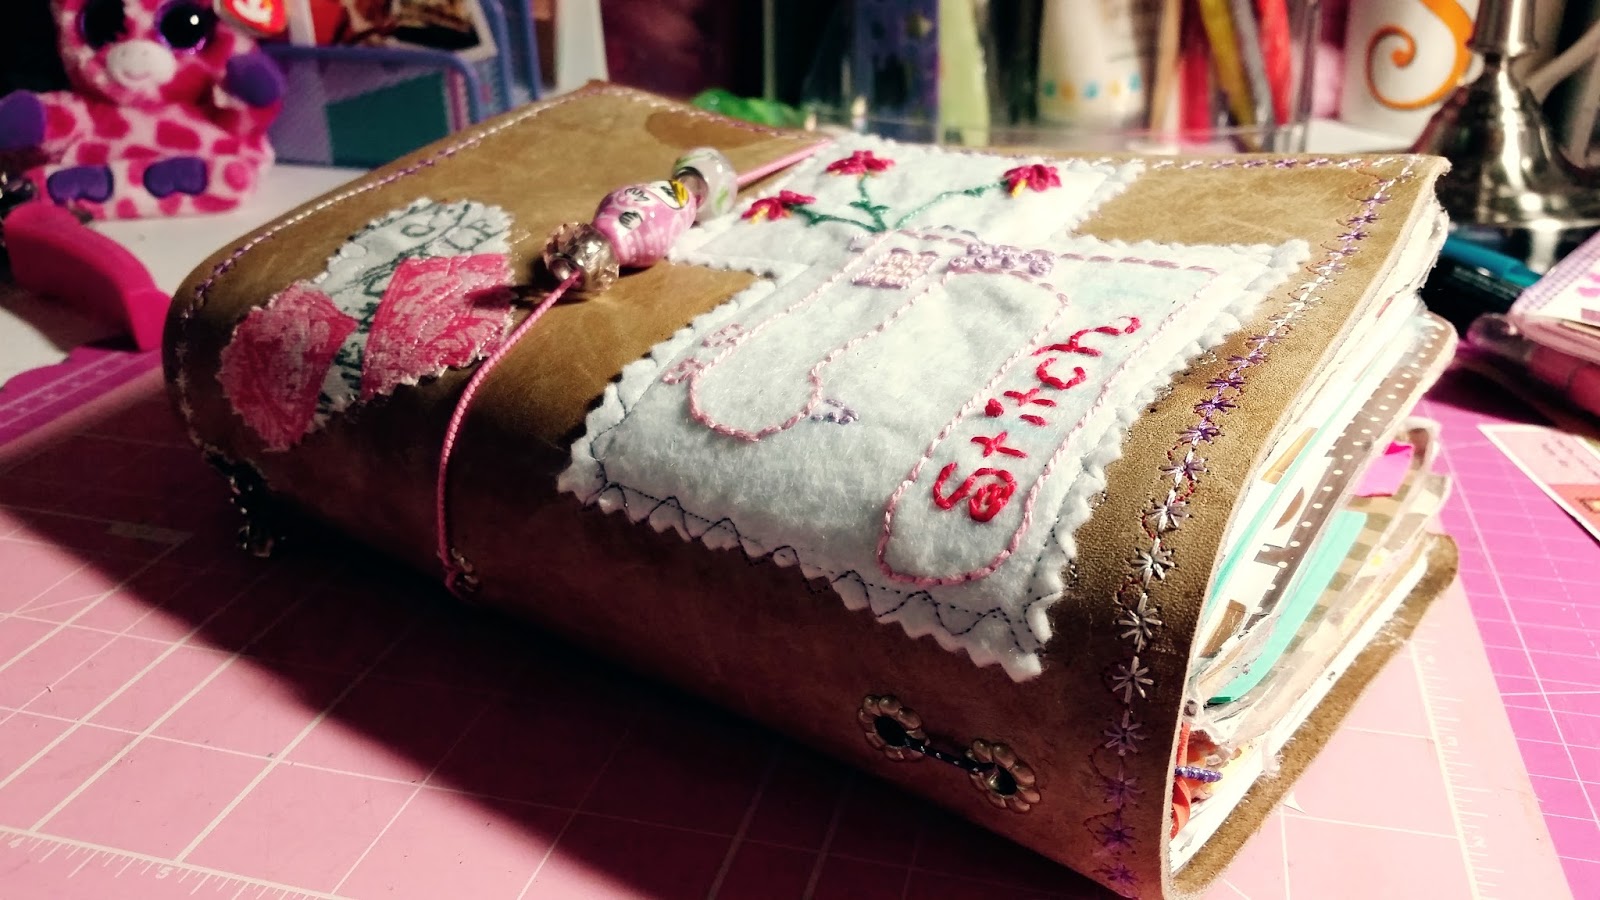
So this past weekend, I was in the mood to make a real leather Midori style notebook, and I knew my leather source would be a 30-year-old Coach bag that I had never let go of. (I'm all about upcycling) When I graduated from college and got my first job, I really wanted a nice bag, and Coach was the thing in the 1980's. So I have never let go of my first Coach bags, and my big brown one was well-loved, let me tell you. WELL loved! I was running from the beach in a rainstorm one day when I got a huge watermark on my bag, and it never went away. That whole side of the bag looked especially loved with more than one watermark and wear on the leather, so that's the side I cut first to make the Midori. It measured 9X12. Perfect for cahier size. My next question was, what to do with the love, the watermarks, and the imprints where the bag handles had been. I would have loved it to be just a perfect piece of leather...cut it...put in the grommets and done! I certainly could have just left it with all the love and imperfections--nothing wrong with that! But the more I thought about it, the more I actually wanted to applique where the handle had been and add decorative stitches. But could I sew on this leather? And sew, I did.
Well loved leather bag reborn into a newly loved Midori
First I cut out the whole side. Then I took a seam ripper and took off the handle. I took my ruler and rotary cutter to straighten up all the sides and then I put the approximately 9X12 piece of leather in my sewing machine and put a decorative stitch all around the edge, first with some red embroidery thread, and then with a purple variegated thread. I loved it.

I looked around in my stash for what to applique. I'm always embroidering on pieces of felt, and I'm always cross-stitching something. So I found an embroidery to applique to the front cover, and some fabric to make into a heart, to cover a little cut in the leather on the front cover, and then a matryoshka cross-stitch for the back cover. Of course, I have to have a matryoshka doll on there somewhere!

After I had all the stitching done, it was time to add the grommets--one goes in the center back spine, two at the top spine, and two at the bottom spine. This is because I like to have two pieces of elastic on the inside so that I can add a total of six booklets. With such a piece of roughed-up well-loved Coach leather, it was fun to add these decorations, and it made me want some pink sparkly elastic for the closure with some cute beads added.

Appliques all stitched.
I use a piece of 18-inch elastic and thread it in double and tie a knot.
You can see on the inside cover where the handle had been!
I have to say, making a fabric Midori does take a bit longer than this leather one. There is much more cutting and stitching involved, and there is a liner, more ironing, and I add pockets and pen loops with fabric Midori's. With this one, I will just add a binder clip to keep a multi pen on there. I made a six-pocket folder for the inside with a dashboard, so no pockets needed on the inside cover. (more about the insides in another post!)
A c-s matryoshka appliqued on the back cover--there's an old stain I left exposed.
Remains of the day--the bag, now cut up--there's another good piece of leather!
Honestly, if the hardware on this  bag had held up, I don't think I would have upcycled it like this. But it was just rusty and gross, and now I'll basically be using this bag in its new life every day!
I add a charm to the back too.


Although I covered up where the bag handles had been, because I thought it looked odd, I don't mind having all the imperfections in the leather showing. To have a big ole water stain reminding me of running from the beach in a rainstorm when I was young, not bad! Midori's are all about memories and planning for the day and the future. Mine is very personal.

See other Midori posts here:

Making a "baby-dori" from Coach leather
Making and decorating Midori booklets
Stitching a fabric Midori and decorating booklets for it
Planner peace in your Midori

Eat, Write, Dream, Stitch


Thursday, July 23, 2015

Day Designer--Doodle Planning


My desk planner of choice: The Whitney English Day Designer - weekly layout.
What's in it: My to-do list for the week, a master make list at the front, appointments and events and notes.
How it makes my week: I love doodle planning--I scrap a little, smash a little, use colorful pens and lots of washi--it's a combo that really makes me happy to look at my current week, and look back at the past weeks.

You know, I've always had an inner planner girl. It's just that now, the super cute stuff is happening! Years ago planners were boring, so I would buy those fabric covered notebooks, very cute at the time, and make those into my planners. In my recent past I've bought Mary Engelbreit, Daytimer, Orange Circle, and recently made my own big homeplanner that serves as headquarters. It has menus, shopping lists, a recipe section, and folders for clippings, mail, in box and out box. Really love how I set it up and it's a constant reference.

Check out how I made my own home planner part 1 and part 2

Why get another planner? Why grow another flower? That's my answer! I couldn't resist Target's new line of the Whitney English planners because I had already been wish shopping online for one to doodle in. Less than 12 bucks, no shipping cost, and in my hands today made all the difference in actually getting one. It's beautiful, lightweight, and helps motivate. My planner is:
  • My personal assistant
  • Motivator
  • Muse
  • Creativity starter
  • Idea generator
  • Playground
  • Scrapbook
  • Smashbook
  • Get-er-done tool
Inside my planner
Whether you are a writer, sewist, scrapbooker, cardmarker, jewelry maker, organizer...a great planner that you enjoy diving into can make you more of the queen of your empire you were meant to be.
Make page markers with paper clips and glitter washi.

Have fun. Use your scrappy stash, stickers, washi tape, and stamps. Use a little thank you stamp on each week, and then note three things you're thankful for regularly. I snipped out pages from my vintage Workbasket magazines and made them into stickers. I made some typewriter printables on pickmonkey and turned them into paperclips. Sparkly washi tape also makes super cute paperclips.

Here's a gift idea: buy a cute planner for someone, make special paperclips, diecuts, and print images that relate to them personally for some stick-ons to use in their planner, include washi tape and colorful pens and it's a real gift. For example, I printed out the cute Little Kittle dolls I used to play with in the 1960's, an image of my Barbies, my Mrs. Beasley doll, and of course I love images of sewing machines and typewriters! You can print your images onto sheets of Avery shipping label paper to create actual stickers--much more economical too. Stickers can get expensive. And there are free printable planner stickers online.
Now I love doodle planning as much as scrapbooking. Plus, it makes me get things done!

Eat, Write, Dream, Stitch, Plan


Monday, July 20, 2015

DIY Midori with Coach Leather

I have joined the Midori fan club. I love this method of notekeeping, sketching, and journaling. And to make sure I loved it, I made one. 


You can easily find a YouTube video to guide you in the process, but I had a twist. You see, I also love Coach bags. I have the vintage kind with the glove tanned leather and in my Coach stash was a little case that was made to hold a tiny device called a Visor. Everybody had them back then, and I was gifted with a Coach case to keep my little device safe. The problem is, the way the case is made on the inside, it can't be used for anything else. 


I couldn't take it, because I love that coach leather. So...

I destroyed it.

And I made myself a baby Midori. The rectangle of leather I cut out was small, so my DIY Midori is just a bit smaller than the classic passport size.

After trimming out my rectangle of leather, it was easy to use my Cropadile to put a grommet in the back for the elastic that wraps around the whole case, and then two grommets each at the top and bottom to string in two pieces of elastic that now holds four little notebook inserts, a little folder, a dashboard, and a few plastic pockets. You can buy some really cute Midori traveler's notebooks on Etsy that come with charms, so I included some charms on mine from my bead stash. Actually, I didn't buy anything! I made this whole babydori from the leather I had, scrapbook papers, notebook paper, and watercolor paper for the inserts, and the grommets I had on hand. I found the heavyduty black elastic cord in my MIL's old sewing stash. But you could certainly buy some cute colored elastic cord.
I don't know if I had more fun making the notebook, or the inserts. If you buy the traditional plain Midori inserts, you can certainly decorate with them all you want with your scrappy stash, stickers, stamps, washi tape, everything. You can add index tabs, your own charms, whatever you like. I made a cute dashboard folder to go around one of the notebook inserts with cutouts from an old Workbasket magazine, and some packing tape to laminate it.


Making Midori inserts
Here's a peek inside...and keep in mind, I'm still having fun decorating it.
Inside my babydori
Now the question is, do I want a full size Midori? The answer is yes! My babydori now rides around in my bag, and I use it a lot! But before I drop around eighty to ninety dollars to buy a Midori and all the inserts, I've decided just to make more. No, I'm not cutting up a Coach bag! I love my bags...this little case was certainly an anomaly. I am busy making stitchydoris! I'm using cute fabric, embroidering, and doing some experimenting right now to make full size fabric Midoris. And of course, the best part is, I'm making more inserts. I also plan to order a couple of really cute ones from Yellow Paper House on Etsy...check those out if you have a Midori.

This was the best decision...I'm enjoying this Coach babydori so much. I'm linking below here to what I think is one of the best explanations of how the Midori works, if you're curious and don't know, with the Reset Girl on YouTube.

Midori 101

In the meantime, here's another great way to bust your scrappy stash, and upcycle something obsolete! Happy Monday!

Eat, Write, Dream, Stitch, Plan


Wednesday, June 3, 2015

WOYWW 313--DIY Weekly Planner

A dark morning photo for What's-On-Your-Workdesk-Wednesday.

I have scrapbook papers spread out everywhere. It all started when I noticed some of the beautiful customized planners that are out there--usually costing around 70 to 80 bucks! I wanted something very customized that would actually stay around my desk at home--not one for the bag. I like the academic year style, and then decided I actually want an 18-month planner to start this June.

Then I thought, make it yourself miss scrappy stash!
I actually typed some of the weekly pages on my ole typewriter!
So, I've been working on it, and I'm having so much fun. It includes things like plenty of list making which I love, weekly layouts, a go-to recipe section, folders for clippings and receipts, and lots of organizing of ME. It's already almost done, and with all the pretty papers, stamps, stickers, and punches I've used, I think it's gorgeous.
I created some of the weeks in Word and inserted images from online.
I hope to have a little photo shoot soon to be able to go into more detail about my new customized life planner. You know, I thought I was going to talk about a new embroidery I'm doing on some shorts--but once I started on this planner, I got obsessed!

I'm going to visit your desk and find out your obsession this week! Happy Wednesday.

Eat, Write, Dream, Stitch, Plan