Showing posts with label yarn. Show all posts

Thursday, September 12, 2013

Craft Fair Inspiration

Inspiration can arrive from the most surprising places sometimes, even when you're not looking for it. But sometimes you have to go after it. So I found this beautiful little artisan craft fair this past weekend, and the combination of fresh air, a little exercise, and visiting with beautiful crafty artists definitely inspired me. It was a warm weekend for September here in the Ozarks--but a little extra sunshine didn't keep these artists from sharing their creations.
I'll share a bit of what I saw. 

I met a lovely lady who raises her own alpacas and spins the wool! She bought this beautiful spinning wheel, slightly used, for $500. She spins some and sends some to a local mill to make these beautiful blended yarns of alpaca and bamboo. A knitter's dream. I think I'd like to try spinning someday.
The whole craft fair was splashed with quilting boothes, quilting guilds, and art quilts hanging everywhere. Loved it.
I had to buy some of these dishcloths--even though I make my own--they were adorable.

This artist made all their signs from used pallots--pretty cool.

Found all kinds of creative knitting kits in this booth--bought my daughter a spool knitting kit. She's a knitter, and she can't wait to try it.
Isn't this yarn gorgeous? I wanted all of it! But at $21 a skein, I couldn't quite have all of it. This lady made her 100% wool yarn from her own flock of sheep. What a dream. 
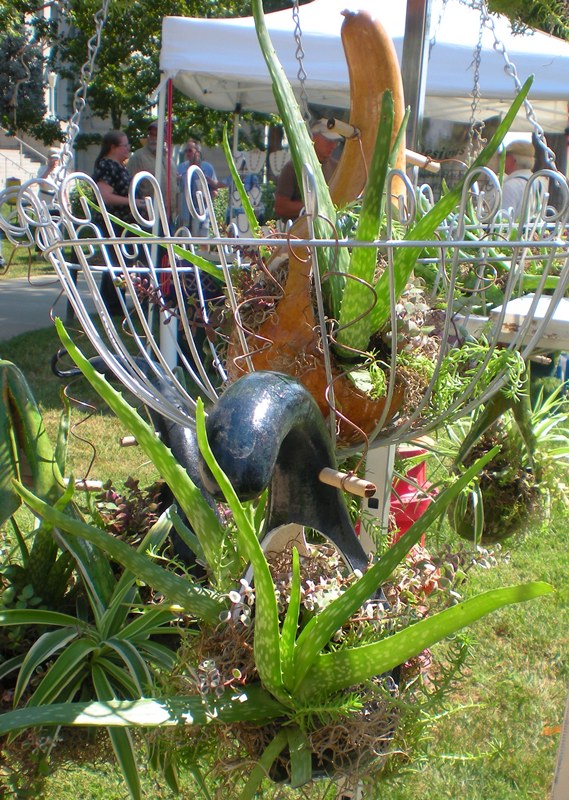
One year I grew a lot of gourds and it never once occurred to me to turn them into aloe vera planters! (I also grow aloe vera plants on my greenhouse all year long) This booth had a lot of gourd art, besides these fabulous planters, and some great information about growing gourds.  But as an aloe vera person, I was especially drawn to this planting display--couldn't take my eyes off of it!

I have always been fascinated by lacemaking--maybe it's because I can't even imagine having the patience to figure out a lace pattern and where to wind all those bobbins! When I stumble upon lacemakers I tend to ask them a lot of questions (I know, I probably annoy them) but they always tell me wonderful stories. And this time one of the ladies explained that the reason why they put those flat bead rings on their bobbins is so that they don't flip over while they're working with them. Genius, of course. I find the bobbins fascinating because I love working with beautiful tools myself. ♥
Just look at these beautifully beaded lace bobbins!


Look at that roll of lace she's made!


Next were the blacksmiths and woodworkers.
A very large lathe

handmade

These were so cool.
I really loved seeing all the fabric some of the artists worked with to make their goods--at one of the booths I finally found something I had been looking for! A catch-all to rest on my worktable--it can be used for just about anything.

Me and hubby having fun at the craft fair.
I bought one of these and it's awesome--but I should have gotten several, for me and for Christmas gifts. What was I thinking? At this point I was a bit hot, we had been walking around for a while. I should have gotten a corndog and thought it over!
So, just a note, if you are at a craft fair like this and happen up something this fantastic, go ahead and do your Christmas shopping! 

Finally I found the embroiderer's guild. What lovely ladies--I really need to go to one of their evening events. I have to giggle because I was wearing a pair of my own hand-embroidered cut-off shorts and so when they asked me if I had ever embroidered, I simply said, "why yes" and modeled my shorts! They laughed, and said, "oh yes, you do embroider."


A great thing about this festival is that it was free! The next one I want to go to is a bit pricey--but by then I think I'll need another day of fresh air and crafty art inspiration.

Eat, Write, Dream, Stitch, Play


Tuesday, July 2, 2013

DIY Tee-Yarn--Making T-Shirt Yarn

We have too many t-shirts in our family. When you think about the years that we've participated in sports, teams, events, conferences, festivals, theatre productions, ballet (yes, I was a Dance Mom and survived), theme park visits, vacation souvenirs--let's face it. The t-shirts add up!

Some you keep, wear, and can't part with (My Elton John shirt from his concert two years ago which was, yes, a highlight of my life). And then there are those shirts that you should have never paid money for them. 

We have all done our own t-shirt tailoring, cutting off sleeves, making slits, turning them into tank tops...and yep, that's fun! It's what my husband does when he needs a mowing shirt. One of my friends can take a t-shirt and with a little added fabric make a whole dress out of it. 

Check it here when my friend made 21 dresses in 21 days. Brilliant!

See here where I made a tank top from two tees.

And then there are t-shirts that made their way into your life, completely free--they were probably from promotions, maybe a drawing, or somebody just unloading. I would say, those are the best shirts to experiment with if you want to try making t-shirt yarn.
"No Mommy! Not this shirt!"

That's right! A whole ball of yarn from a t-shirt. I did not invent this idea, but as a knitter, I had to try it out. I love the idea of knitting something from t-shirt fabric, so I'm on a little quest to create enough skeins of "Tee-Yarn" as I call it, to knit a fun summer tank top.

Keep in mind, there are people who have tried this and failed miserably and even went out and purchased a shirt to do this, and then completely ruined it as they crashed and burned on this project. 

"Bitter! Table for one!"

Don't do that! 1) Only use a shirt you would just absolutely throw away, or turn into a dust rag, to try this for the first time. 2) If you have an old child-size shirt, it would be easier to try this out on a tiny shirt first, which will give you more control and let you figure out what you're doing, because this project can get out of hand very quickly!

I will tell you though, it took me less than a hour to create a ball of tee-yarn, which was fun because I did most of the work while watching a movie. Cool!

Here's how my experiment went--I'll try to guide you through it.

Start with your old shirt laid out. Cut across the top, just under the sleeves. Basically you are cutting off the top of the shirt with the sleeves, and the bottom hem, so you end up with a rectangular piece of fabric. 
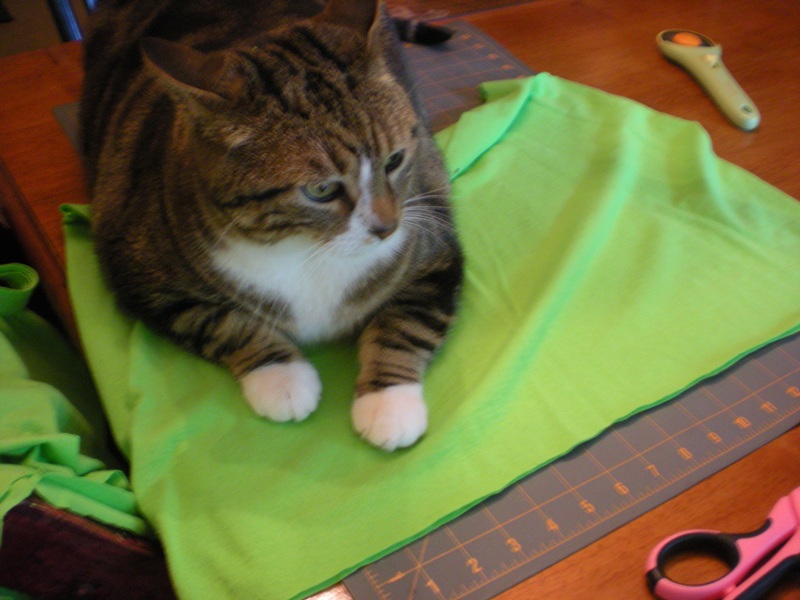
Could my cat leave me alone for one minute so I can finish this! 

So now, you've cut off the top of the shirt, and the bottom hem. Fold the shirt in half from shirt-side to shirt-side. (by that I mean what would be the sides of the shirt if you were wearing it)


Cutting the strips in the adult-size tee
 
Cutting the strips in the child-size tee

Now the two shirt-sides are together on one side. On the opposite end you have a fold which now constitutes four layers, and here is where you start cutting strips, but you leave the top with the two shirt-sides together, uncut. 
 
Cut strips--but leave a top border

Simply cut the strips--but leave that top border uncut. The top border of shirt-sides will stay attached, and this is what is going to, ideally, turn this whole thing into one long strip of tee-yarn that you eventually wind into a ball.
After cutting the strips, unfold

This looks like a mess!
After cutting strips vertically, you're going to unfold the shirt. This is tricky because all those strips want to stick together and jumble around everywhere, but do the best you can so that you can lay it back down and work with the uncut shirt-sides one at a time. 
The child-size shirt after cutting strips and unfolding

With one shirt-side laid out, cut across diagonally from strip to strip. Do this to both shirt-sides, one at a time.

There were times when I kept the shirt flat, doing this, and sometimes I kind of picked it up a little to work with it. This process is tricky and floppy but eventually you work your way across until you have basically turned this whole thing into one continuous long strip of tee-yarn.

I actually tried this out on a piece of paper before I tried it with an old shirt my husband didn't want. So that helped me kind of know what I was doing--but I was not prepared for how tangled and floppy this part would be. 

It was much easier with the child-sized shirt. All the strips stayed straight, and it was much easier to roll into a ball of yarn in one long continuous strip without getting tangled.

Take the end of the strip and start wrapping into a ball.

Keep wrapping and it will turn into a ball of yarn.


In the end, it worked. And there was a lot of t-shirt dust left on the table!


My beautiful knitting needle roll made by an English rose--Lunch Lady Jan
Now, if you know how to roll yarn into a ball, the next step should be fairly easy. Start wrapping the yarn around your fingers at first, slide it off, and keep wrapping it, changing directions as it starts to form a little ball.

My tee-yarn from the adult-sized shirt got very tangled up when I started wrapping it--I'll be honest. With the larger shirt I had to stop every now and then and untangle it as I rolled it into a ball--and sometimes I had to snip off pieces of strip that had stayed together. One time, my strip disconnected--so I just tied a knot and kept going. And, wallah! Very quickly I had a whole ball of green tee-yarn! 

The whole entire child-sized shirt stayed in one long continuous strip of fun, purple tee-yarn--so nice.

As you wrap the ball, the t-shirt fabric naturally rolls in on itself, which gives it even more of a yarn look.


My next task is to pick the knitting needles! And of course, to keep making skeins of tee-yarn.

Have a good humor about this if you try it. There were times I didn't think it was going to work at first, but it did! And, of course, this was much easier the more I practiced. So if it doesn't work for you at first, and you have some throw-away shirts, keep trying. You'll end up with a whole basket of tee-yarn.

Eat, Write, Dream, Stitch, Knit


Saturday, September 15, 2012

Loomyinous Flowers!


Once upon a time, I took a weaving class! That's right, the kind of weaving class involving a weaving studio and huge looms. Luminous looms! It was a Saturday morning class, and I really fell in love with weaving. All except for one thing--threading the loom! When you are working with a huge loom, threading the loom can take...oh...forever! So, it's no wonder that I've always wanted one of these little looms that you can make simple yarn flowers with. Finally, I bought one the other day, and I've been having so much fun!
It only takes minutes to make a little flower...and not much longer to make a bigger, layered flower.
Not even thinking, I happened to choose this variegated Sugar n Cream yarn, and it happened to be the scented kind! It smells like flowers--perfect!
For a little weaving kit--it comes with several looms for circles and squares.
Then the whole thing compacts nicely and travels well. Why didn't I get one of these flower looms long ago? I'm just imagining all the kinds of yarns and ribbons I can use on it to embellish both my fabric and paper projects.
So some of my first flowers were a little wonky as I was getting used to it, but I'm much faster now. Can't wait to move onto the squares! I'm a dream weaver!