Tuesday, February 28, 2012

Weekend Girlie Apron

I made a girlie apron in one afternoon from fabric scraps!
I have wanted a girlie apron...oh...forever! I've seen these fabulous, ruffle-filled girlie aprons in shops all over the place. But my apronspiration started this past weekend with a little shopping trip to Pier 1. I LOVE Pier 1. We actually had a delightful Saturday that started with a family brunch at a wonderful breakfast buffet, and then followed by a trip to one of those huge DVD stores, and yes, I bought a DVD that has four Brady Bunch movies! And, right next door to the entertainment store was a big, luscious Pier 1 Imports store. I can get lost in that store for hours. So, here is the apron that started my madness.
A little apronspiration
Isn't this adorable? I may have to go back and buy it. In the meantime, it was my inspiration to make my own girlie apron. That's why I call it apronspiration. I noticed that the ruffles are not too tight, so I measured my apron skirt base, and figured out that I should cut strips of fabric to about 5-inch by 50-inch, and that would  be plenty to make my ruffles. Then, I found Mary--Mary Engelbreit! Apparently I had purchased a bundled remnant of Mary fabric for a dollar--who knows when I did this--and it was in my fabric stash. The Mary material is so cute with all of her fun sayings, so I decided this would be the first ruffle, but it would have to be longer so that you can see all of that fun stuff!
Mary Engelbreit fabric

I went through some of my fabric stash.
I put a small machine hem all around each strip of fabric, and began pinning and then sewing my ruffles, row by row.


The skirt base of my apron was a scrap of fabric from an old tablecloth--a very thick cotton. Then I found a cute embroidered tee towel that I had bought at the end of last summer, marked down to two dollars! This would be the bib of the apron.
One of my fabric strips has sequins--so girlie!
About an hour of pinning and sewing, pinning and sewing...
A tee towel is the apron bib.
Minnie helped, of course.

 I think when I'm wearing this apron, I may have to dance a little. It simply demands it. So, this may be the beginning of my new line of girlie aprons--for cooking, crafting, and heck, just wearing over a pair of jeans and a t-shirt! One thing is for sure--I will be cutting and sewing strips of fabric for the next several days! I enjoy it though. Now, to take my new measuring cups from Pier 1, and bake something!
My new set of measuring cups!


Eat, write, dream, and stitch something girlie--designed and created by you!

Tuesday, February 21, 2012

No Trashing--Just Smashing

I have never really kept a traditional diary. All this time I have been smashing...and I didn't even know it! I found out, or had this epiphany, when I received a Michaels store email with a Smash book video tutorial. It caught my attention initially because of one thing: the handy dandy combination pen-and-glue-stick with its own loop on the side of the book. (why didn't I think of that!) Then I watched the video, and in turn, other Smash book videos, and realized that scrapbooking has come full circle, back to the casual, laidback activity it once was.
I've never had a pen and gluestick all in one!
Now, I actually love scrapbooking. I have five or six very fat and fancy scrapbooks to prove it. But, my problem is, I want all my scrapbook pages and layouts to be beautiful, and that means really devoting huge blocks of time to it when I'm ready to sit down and have all my photos together, and my hord of scrapbooking supplies and options spread out. So, in the meantime, I've always kept little journals that I write things in, draw in, glue things into, and also jot down my creative ideas and favorite quotes. I'm a big-time quote collector, but also picky about my quotes. 
My box of journal smashing goodies that's always handy.

Anyway, my other problem is, I may be somewhere with my journal, but nowhere near a gluestick. Or, I might have some things laying around that are not necessarily worthy of their own scrapbook layout, but I still want to keep them. Example: a very old Pandora bracelet ad that I gave to my husband as a hint, and two years later, got my Pandora bracelet for Valentines day, at which time he gave back the torn-out magazine ad to me (he had kept in his wallet, cute!), and yet I couldn't throw it away. (one woman's trash is another woman's treasure!) It was then stuck in a ribbon board, but not anymore. When I saw those Smash books, I knew they were for me, and went right down and got a book, a really cute stamper that has a date stamp and different little sayings, and I got an extra combo pen-and-glue-stick, cause I just love that!
Took a half-hour to smash a few things yesterday!

And by the way, (Michaels should be paying me for this) that glue stick is a very smooth glue and I really like it. I also love that everything is archival quality--perhaps unlike some of the other journals I have. So it's all good now! However, I went back to get more Smash goodies, and they had run a sale on that brand and pretty much ran out of everything! I really wanted a pink Smash book, but I like my red one. I have no idea if they're going to keep selling this stuff, but I have enough for now. And really, smashing, as I said, is what I've been doing all along. And I could attach an elastic loop to any journal and always have a pen and glue stick at the ready!
Inside cover of my Smash book

Here are the pages I decided to smash in yesterday.
The actual Smash books have different designs on their pages. You might be just writing in some of those pages--and then there will be others where you are smashing in so much memorabilia and junk, you don't see the original page--and that is perfectly fine. Anything goes when you're smashing! It's all about whatyou like, what inspires you, what you are feeling, and what you want to remind yourself about. Life is good. Breathe. Remember every moment. Love each other. Appreciate your blessings and be thankful.


I smashed a few of my favorite things!
It is easy to tuck this journal into your bag, and away you go, ready to jot down a thought or idea. I'm really enjoying this kind of old-fashioned ultra casual journal/scrapbooking. Next time I see one of my dream bags in Vogue, it's going to be smashed!
I never Smash alone. Minnie loves anything having to do with paper or yarn.
I'm sure I'll find some great excerpts to journal from my daily devotional book.
Eat, write, dream, stitch--and then smash it!

Saturday, February 18, 2012

Needle and Thread Book

I always have a stitching buddy with me.

Stitching up a handy dandy needlebook this weekend is one of the fastest, easiest little craft projects around. And the best part is, I'm more organized than I was yesterday! 
I'm one of those who tends to buy tapestry and sewing needles about every other time I go to Hobby Lobby, because I can never find them! Also, I have a soft spot for those 14k gold tapestry needles--I love them and they slide through fabric so nicely and last forever...that is if you can keep track of where you put them!
All you need is felt, floss, a button, and a needle.

It's fun to start this project because you can use all your leftover felt squares from Christmas and Valentines projects. You can also make your needlebook any size you wish--you might want a little tiny one for your bag, or a nice medium size needlebook to keep on your sewing table. Then, simply cut four or five squares, all the same size of course, and then a rectangular piece to button your book closed.
Now, prepare yourself for how fast this is going to stitch up! You'll definitely want to consider this as a gift for your favorite sewists.

In putting this together, I realized it would be nice to have each little page dedicated to certain kinds of pins and needles to keep myself even more organized, so I embroidered on each page to keep them all straight. My first little needlebook features a tapestry page, sewing needles, and safety pins. But I'm definitely thinking I need a book that keeps my gold needles together all in one place, straight pins, and a variety of threaded needles too.
If you wish, embroider your book title on the cover, then sew on your button which will keep your book fastened. Then sew the strap with embroidery floss onto the back cover with a nice "x."  Embroider your page titles and then you're ready to blanket stitch the spine. I also gave the book cover a blanket stitch trim, and sewed around the button hole I cut into the strap.


My little Needle and Thread Book
Page 1 filled with embroidery needles
Page 2: regular sewing needles
Page 3: a few safety pins
As I was going through my needle stash and planning a few more needlebooks, I took some time to go through my mother-in-law's lovely stash of sewing delights that came to me recently in the cabinet of her 1950's black Singer Sewing Machine. I want to get it all organized and keep it together so my daughter can enjoy it too someday. I was really amazed at what the price of needle and thread used to be!

I don't know what year she purchased these, but I like the prices!
Good thread is so expensive now compared to what she paid here.
Ahhh...my daughter's opening night flowers for her winter play. Eat, write, dream, and stitch a little book just for stitchers!

Tuesday, January 31, 2012

Cuddle Creatures

 Here are some creatures that could use a little comfort, and maybe a cuddle.  I love knitting...especially when I can create something beyond a scarf! I was inspired to make my "Cuddle Creatures" by my friend Pam, who designs and knits her own line of the most adorable "monsters" ever!
I add an iron-on heart to the rear!
But I didn't want her exact specs, so that I could springboard into my own creations. Therefore, I had no idea how these would turn out! The first one, a little blue guy, was smaller, but my husband loves him, and even let him ride on a trip to North Carolina! Meanwhile, I was busy clicking my needles with a new idea--I would make a creature for everyone in the family for Christmas!
My littlest nephew walked in one day when I was working on a purple girl (she is made of lavendar-scented Sugar and Cream yarn)--he asked a million questions about what I was knitting, why was I knitting it, and what is knitting anyway? So cute. Then he asked if I would knit him a creature. He said he wanted something white with blue hair, and then this adorable six-year-old sat down and drew the face he wanted me to ultimately embroider onto his Cuddle Creature. It was an angry face, so I had to laugh--but I had my orders.

Lil Abe Ominable
As this big white guy with the angry face emerged, Sam and I decided that he was an abominable snowman! That was all I needed to write his story, "The Story of Lil Abe Ominable." Nicholas decided on green--so knitting his creature with a lime-scented yarn, he became Al E. Gator, and I wrote his story too. Then I created Christmas boxes for the boys and filled them with goodies, including  their hand-knit creatures and homespun stories. One of the new things I taught myself while creating these cuddly things was to knit an icord! I enjoy knitting icords so much, I just kept knitting them in different colors and came up with a whole new project I will share next. While my older nephew enjoys his alligator, the younger one sleeps with Lil Abe every night! There's nothing like stitching something you can dream with.

Eat, Write, Dream, and Stitch something cuddly!        


Tuesday, October 25, 2011

Herbs from Your Garden in a Bottle

Bottles and bottles of fresh-dried herbs for recipes, gifts, and just because they smell so good!

Here it is approaching late October--and many of my herbs in the garden still look gorgeous. It's hard just to surrender them to the first bite of frost--I always gather the last bouquets, but they won't get me through an herbless winter. Then, I saw a Facebook status from a friend who was drying his basil. Great idea! I dug out my old food dehydrator, and decided to try it.
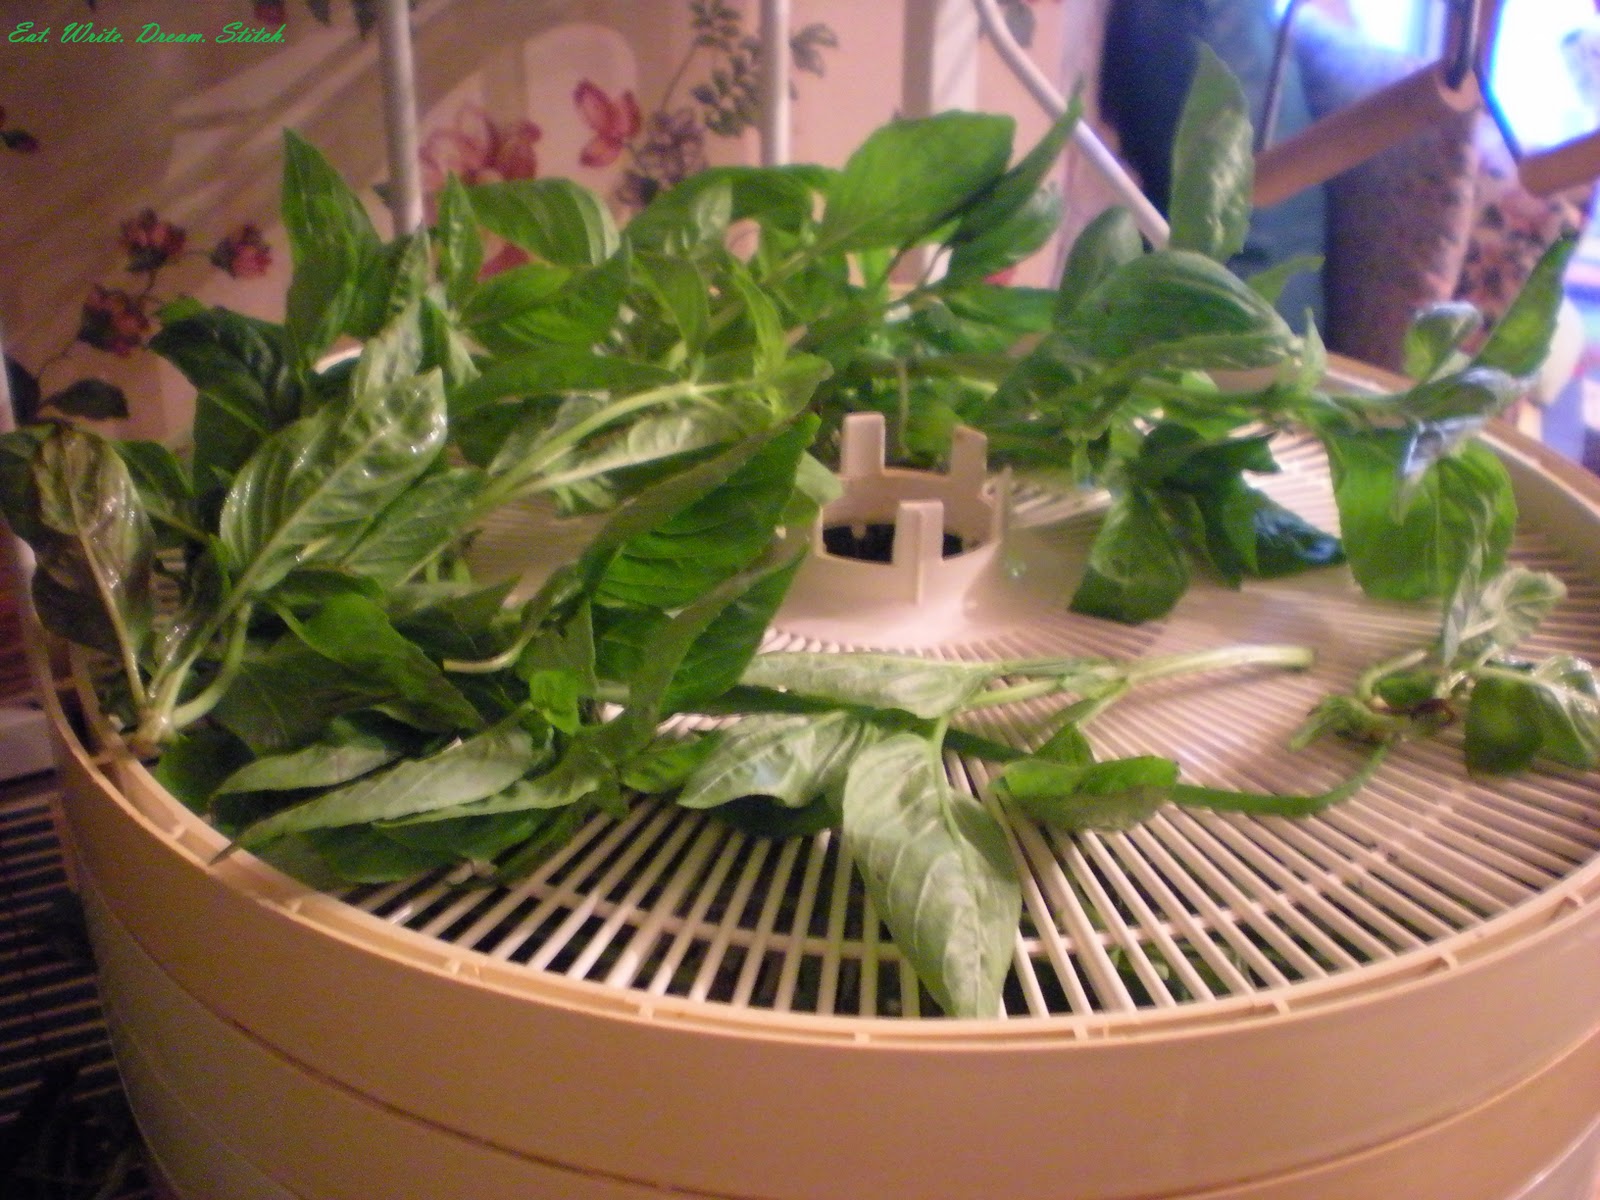
Most herbs can be dried right on the stem--pretty easy.
I set the dehydrator at 105 degrees, filled the trays with fresh basil and parsley, and let it go!

About five hours later, the parsley was dried, brittle, yet  very green. You want it completely dry so there is no chance for nasty little bacteria to grow in your lovely herb bottle.

I found some tall pretty herb bottles I had bought years ago--embarrassed to say those herbs were still in them! So I emptied them, washed them clean, and dried them well. They were now ready to fill with my own fragrant, fresh-dried herbs.
I actually left the parsley tag on the parsley bottle. Once I crumbled in the dried parsley, using a funnel and skewer--it was bright, green and gorgeous! Exactly the result I wanted. In the meantime, the basil was taking a long time to dry--in the end, it was over eight hours when I finally called it a day for the basil. I didn't feel like it was as successful, but I did get some nice dry basil herbs out of it.
Last basket from the garden
Overall, I'm very happy with this idea, so next on my list is my English Thyme, Lemon Thyme, Garlic Chives, Sundried Tomatoes, and of course, more of that gorgeous flat leaf Parsley!


Eat, Write, Dream (of dried herbs), Stitch!

Wednesday, October 19, 2011

Some days, you have to get your priorities straight--yarn yoga first.

There are things to clean, a pile of papers on your desk, coupons to clip, your job, your messy closet, and shopping to do.  
Yet, all you can see, sitting quietly in the creative corner of your home is a basket of beautiful yarns. They are waiting, just waiting to be transformed into fabric--a fabric that might keep your neck warm, drape around your shoulders, wash your kitchen counters, or even become a tote bag.

Suddenly, life's little and big chores can be put on hold. You need the comfort of your kitties, a mug of tea, a Nancy Meyer movie, and the dependable little click-click-click of your knitting needles before you face another mess to clean or a long day at the office. Think of it as yarn yoga.
And speaking of dependable, one stitch that will never let you down is the stockinette stitch--my very favorite! It is simply knit a row, pearl a row. That's it! If you know how to knit, but are not quite comfortable with pearling, it is very easy to get used to it. Instead of slipping that right needle in the loop behind the left, like you do for the knit stitch, you point the right needle down into the loop in front of the left needle, wrap your yarn over it, and then slip it off. The stockinette stitch creates a nice, smooth knit fabric that is so perfect for so many creations.

Each end will have a knit-stitch border


I happen to love the 100% cotton Sugar and Cream yarns--and I always find them on sale, so with a whole basket of these yummy yarn planets, I started making what I call a Sugar-n-Cream-Crazy-Scarf. I threw caution to the wind and just started combining different color skeins.
I love self-striping yarns
I started off with the leftovers of a brown and tangerine striped skein, then used leftovers of a color-sprinkled skein, and then started in with the self-striping blues and greens--those may be my fave so far!


I guess I'm a weekend knitter, an evening knitter, and sometimes even a lunch-break knitter. While I currently have several UFO's lurking around my craft studio (Unfinished Objects)--I thought I could take a break from it all and whip up this fabulous crazy scarf for winter. It's going to take a couple of weeks now to finish, because I want to make it nice and wide and long. But I love making it! So therapeutic and calming.


I am now in the middle of a skein of red, white and pink Sugar and Cream. I'm trying to decide if I want the ends of the scarf to match--or if I really want to get crazy and introduce a whole new color. Decisions, decisions. But these are the decisions I love to make. Please enjoy a little yarn yoga for yourself.
To make your Sugar and Cream Crazy Scarf, you will need to cast on 45 stitches using size 7 needles for a nice wide, thick scarf. Knit about 10 rows, and then begin the stockinette stitch. You will need around 8 to 10 skeins of the Sugar and Cream yarn. The skeins are not that big--which is why you can find them on sale for around $1! Keep stitching in stockinette, and then knit the last 10 rows. With all this knitting, and your beautiful creation, you will be calm and cozy when the winter winds hit!

Joseph is hanging out on the greenhouse, while I Eat, Write, Dream, and Stitch!


Monday, September 12, 2011

A Basket of Happiness--from the garden

"Arranging a bowl of flowers in the morning can give a sense of quiet in a crowded day--like writing a poem or saying a prayer."
--Anne Morrow Lindbergh

"Let us be grateful to people who make us happy, they are the charming gardeners who make our souls bloom."
--Marcel Proust