

Sunday, January 27, 2013


Saturday, January 26, 2013
Cheesy Golden Potato Bake

Cheesy Golden Potato Bake
 4 yukon gold potatoes
2 tablespoons butter
1 small onion, chopped
1 clove garlic, minced
2 tablespoons flour
1/4 teaspoon salt
cracked black pepper to taste
1 cup milk
1 to 2 cups shredded sharp cheddar cheese

Slice the potatoes in very thin rounds--you really need a food processor with this attachment, or a mandolin slicer, or what I use--my Saladmaster! (a tool that I'm pretty sure hardly anyone else on the planet has) Melt the butter in a small to medium size sauce pan and saute the onions and garlic for just under a minute or until onion is transparent. Stir in flour, salt and pepper and slowly pour in the milk, stirring and stirring until the mixture thickens, over medium high heat (you do not want to burn the milk!). Stir in the cheese until melted. This is your sauce.
 | ||
| I got my Saladmaster with all its different slicing cones many years ago. |
Layer half the sliced potatoes on the bottom of a greased casserole, and pour over half the sauce. Layer on the rest of the sliced potatoes and pour on the rest of the sauce. Cover and bake at 350 degrees for 45 minutes. Uncover and bake at least another 20 minutes until golden, edged in brown, and bubbly. Enjoy!
 | |
| I had to have a cookware party to get this thing almost 25 years ago! Still works great. |
 |
| Ready to go in the oven! |
 |
| I almost forgot to take a picture before they started digging in! |
Friday, January 25, 2013
Art Journal Friday


Eat, Write, Dream, and Stitch in your journal.
Thursday, January 24, 2013
Valentine Banner - Easy to Stitch!


VALENTINE BANNER SUPPLIES
 Heart-shaped cookie cutter
Chalk or marker
8 1/2X11 sheets of felt in any colors or patters you wish
Scissors and straight pins
Colorful thread or floss
Fiberfill
Optional embellishments: buttons, paper flowers, crocheted flowers and glue dots to apply
Large darning needle
Thin ribbon
-----------------------------------------------------------

 STEP ONE: Fold felt over so that you can cut two pieces at once and trace the heart using the cookie cutter as your guide. Pin together and cut out the two heart shapes.
STEP TWO: For each heart, face the two wrong sides of the heart together and machine stitch around the edge, leaving a small gap to stuff.
STEP THREE: Optional step--apply a button or flower with a glue dot.

STEP FIVE: For each banner, thread a large darning needle with thin ribbon, and thread through the top part of each heart until you have all your hearts strung together in a banner, leaving some ribbon on each side for hanging.


Wednesday, January 23, 2013
WOYWW 190--A Little Art, a Little Coffee

Link up your happy space right here!
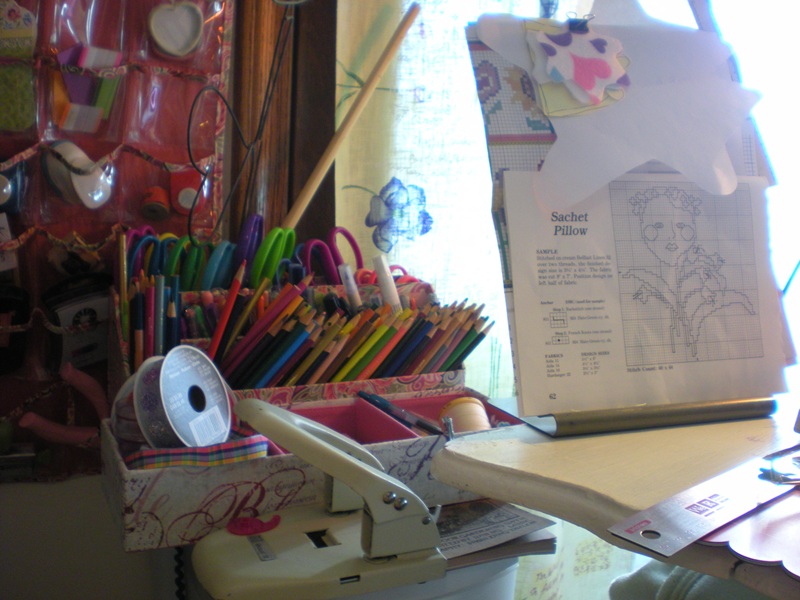 |
| To my left |
I got the biggest giggle last week when Jan commented on how tragic it was that I had to go to work instead of staying at home and stitching hearts! I giggled because I totally agreed! Oh how I wanted to just take my time sipping coffee and stitching that day! Most Wednesdays, though, find me getting up early, getting on the treadmill, linking up my workdesk photo, and having my coffee with a few precious minutes of art journaling before I dress, watch the Today Show, make my lunch and skidaddle off to the office! (paychecks come in handy though when I need supplies)
Of course, every WOYWW comment is an absolute delight. I don't know why it's so fun to peek at someone's desk, and then find out what others think of yours. I never get tired of it!
 |
| My worktable faces out in a corner of the room so I can see the windows and the TV if I want! |
So, just so you know, I did spend a lovely holiday at home on Monday (Martin Luther King Jr. Day) and I finished the heart banner! Very fun. Now, back to reality until Saturday morning--I have a morning of crafting and catching up on my shows planned for myself. Ahhh.
 |
| I cut hearts, machine stitched the edges, and threaded onto ribbon for a fun, easy banner! |
Stay inspired...get in touch with your inner crayon-holding finger-painting child...and follow your bliss anytime you Eat, Write, Dream, and Stitch.
Monday, January 21, 2013
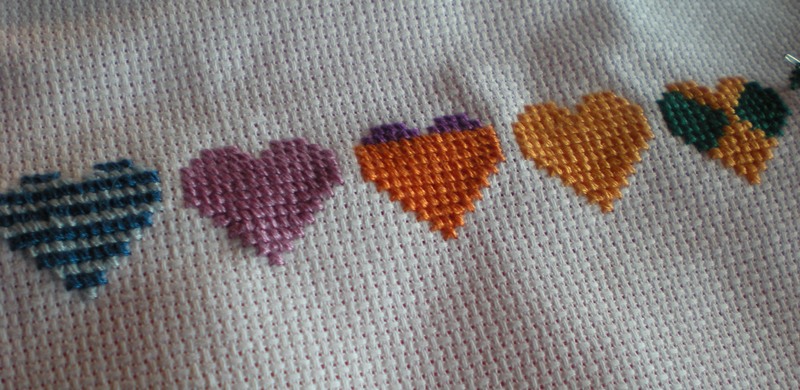
Heart a Day 2013 - Week 3

Project Summary
Project Name: A Heart a Day 2013
Start Day: January 1, 2013
Materials: White Platinum 14-count Aida Cloth (a beautiful, high-quality,
crisp white) DMC's Anniversary Embroidery Floss Pack - 36 gorgeous colors
celebrating DMC's 100th anniversary, beginning with DMC 3831 and going in order through 3866
Technique: Cross-stitch
Colors used in order in Row 1: 3831/3833; 3833; 3831/3837; 3837; 3838/3836; 3838; 3842/3841; 3836; 3853/3837; 3854; 3854/3847; 3847
Goal: Fill the 18X20 inch aida tapestry with 13 rows of hearts
x
|
x
|
x
|
x
|
x
|
x
|
|||||||||||
x
|
x
|
x
|
x
|
x
|
x
|
x
|
x
|
x
|
x
|
|||||||
x
|
x
|
x
|
x
|
x
|
x
|
x
|
x
|
x
|
x
|
x
|
x
|
x
|
||||
x
|
x
|
x
|
x
|
x
|
x
|
x
|
x
|
x
|
x
|
x
|
x
|
x
|
||||
x
|
x
|
x
|
x
|
x
|
x
|
x
|
x
|
x
|
x
|
x
|
x
|
x
|
||||
x
|
x
|
x
|
x
|
x
|
x
|
x
|
x
|
x
|
x
|
x
|
x
|
x
|
||||
x
|
x
|
x
|
x
|
x
|
x
|
x
|
x
|
x
|
x
|
x
|
||||||
x
|
x
|
x
|
x
|
x
|
x
|
x
|
x
|
x
|
||||||||
x
|
x
|
x
|
x
|
x
|
x
|
x
|
||||||||||
x
|
x
|
x
|
x
|
x
|
||||||||||||
x
|
x
|
x
|
Enjoy!
|
|||||||||||||
x
|
||||||||||||||||
Cross-stitched Heart
|
 |
| The technique of doing most of the stitches on the front speeds things up! |
Eat, Write, Dream, and Stitch daily.
Subscribe to:
Posts (Atom)